
Green House: Before and After
June 1, 2018
The days have flown by this spring, and the flip is no longer ours!
I plan to break down the costs, profit, and details of the sale – but I’ll leave that for another post.
This post is for one thing only: before and after pictures!
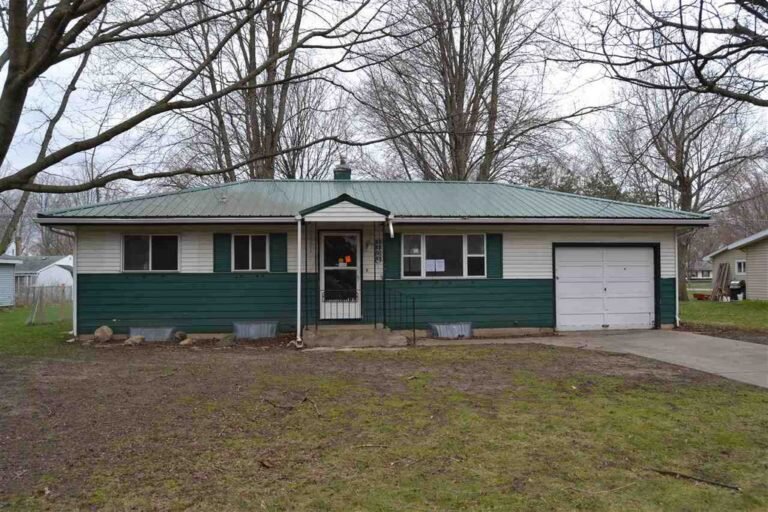
THE FRONT:
This was one of the things we tackled first. The home got new windows, siding, gutters, doors, garage door, landscaping, and pretty columns.

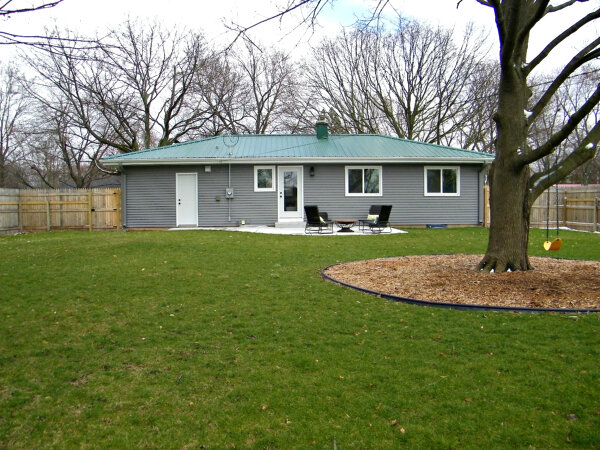
THE BACK:
That giant tree right by the house was removed for safety, and a new patio, new landscaping, and privacy fencing complemented the new doors, windows, siding, and gutters. The tree swing was original. 🙂

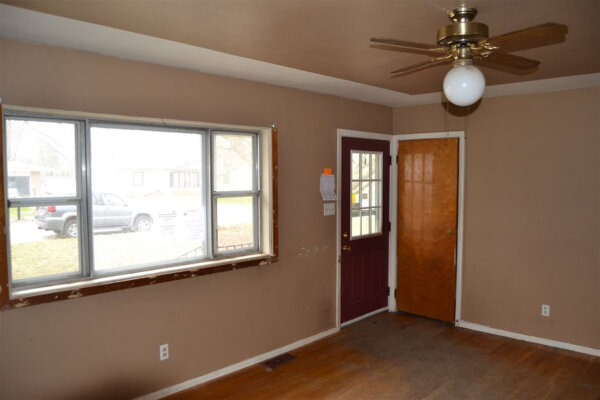
FRONT ENTRY:
Yes, that ceiling fan was in a strange off-centered spot. New doors, windows, trim, and electrical went into this space. We refinished the original hardwood floors in here.
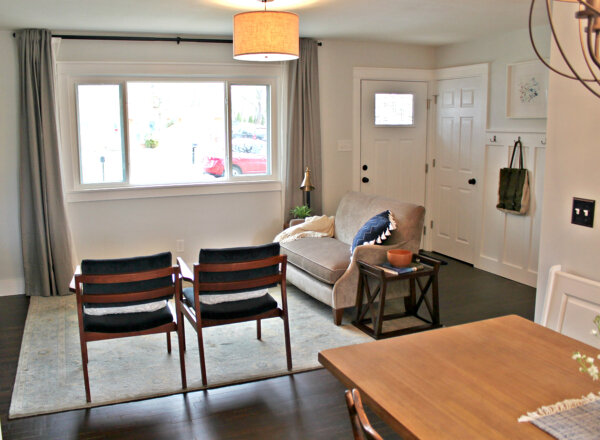
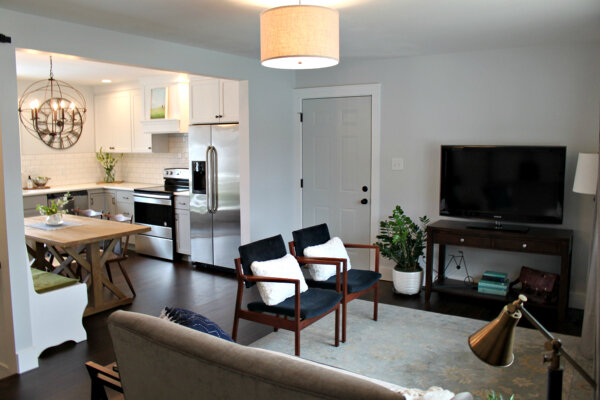
LIVING ROOM:
As you can see, the room got a much needed door from the home into the garage (there wasn’t access from inside the house before).


The opening between the kitchen and living room was widened, and new flooring was installed and finished to match the newly refinished hardwood in the living room.
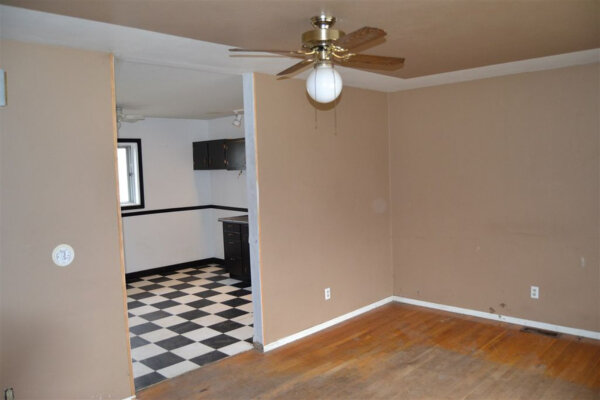
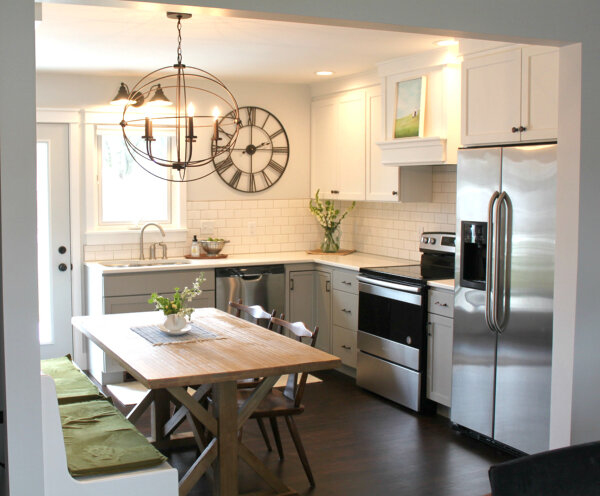
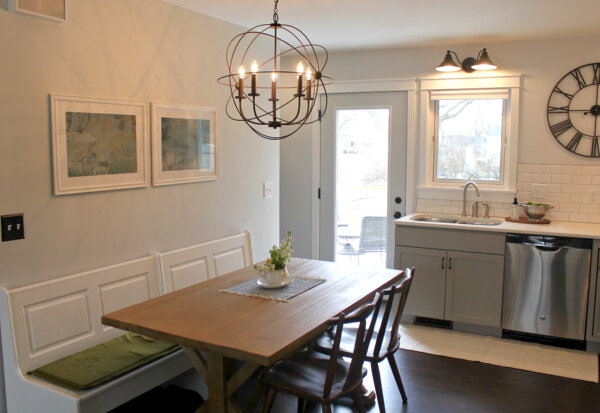
THE KITCHEN:
We moved the sink to a new location, and left just enough of the original wall for the fridge to be tucked up next to it.

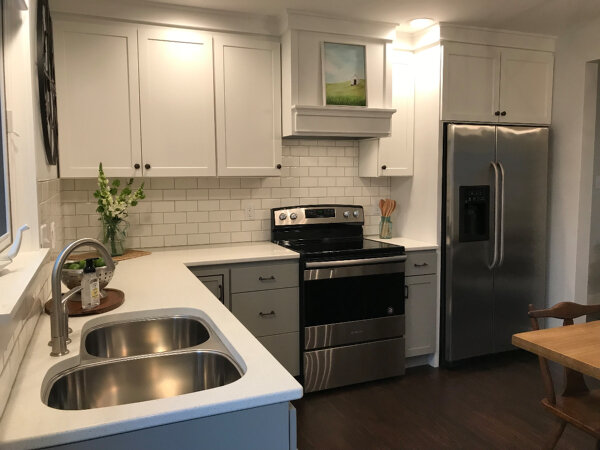

An area that doesn’t have a before picture is the newly created pantry area. It’s tucked away to the left of the new back door, so it’s not visible to guests unless they’re at the back door:

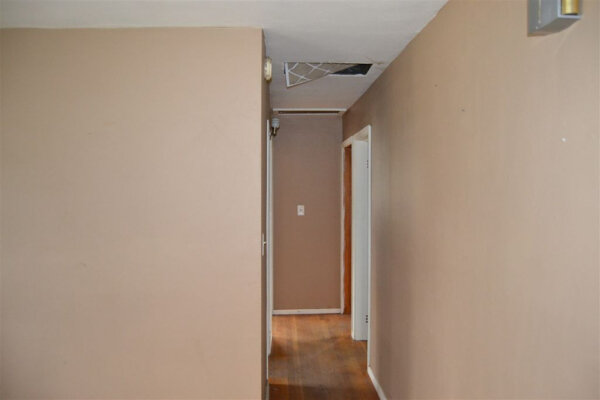
THE HALLWAY:
What a difference pretty trim makes!

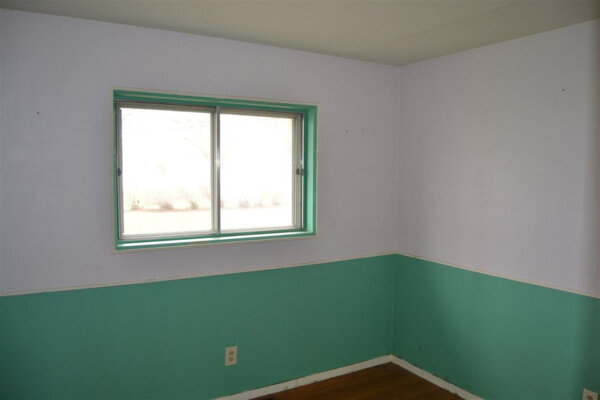
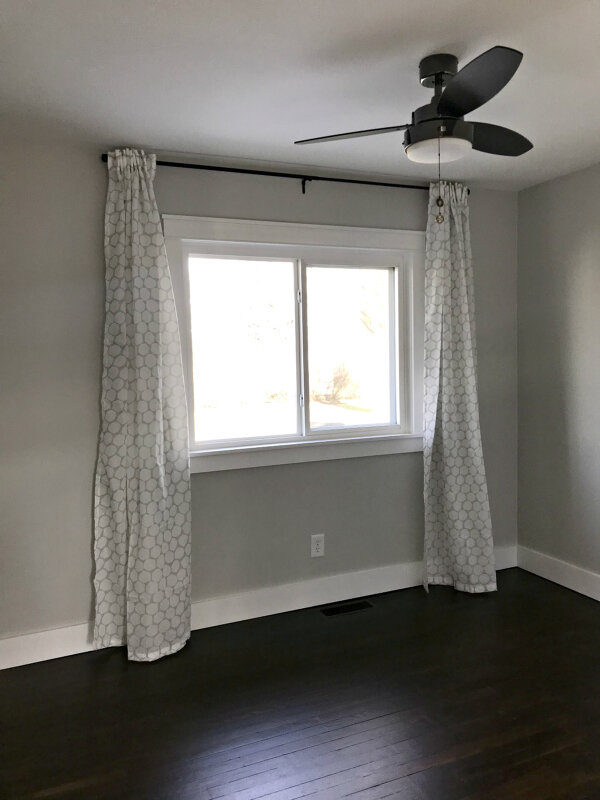
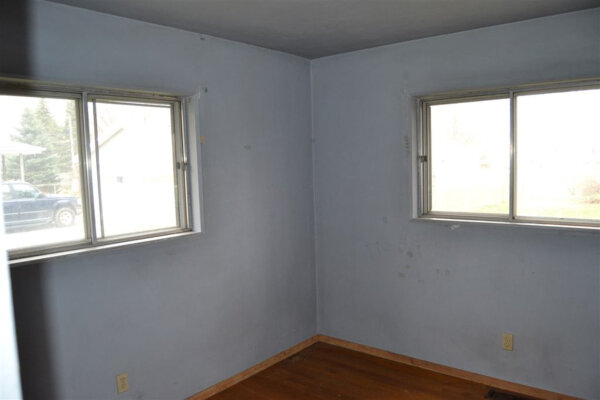
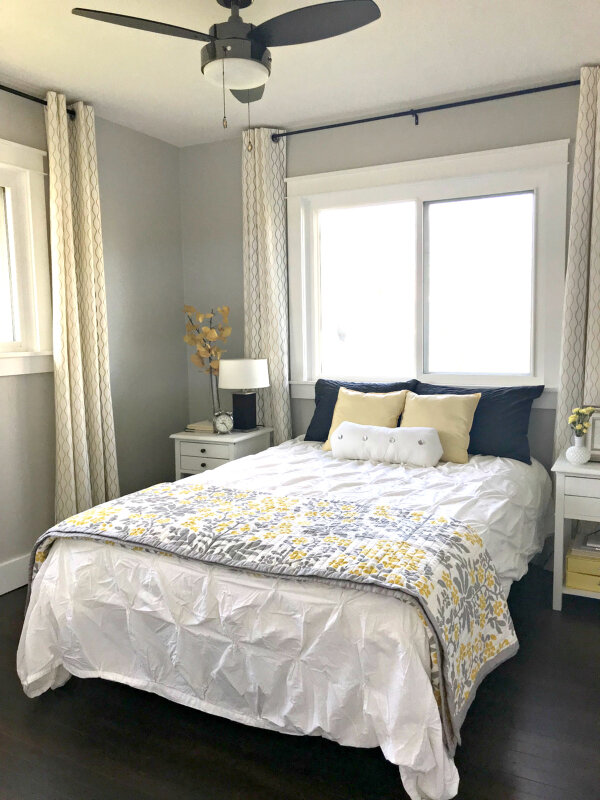
BEDROOM 1:
All the bedrooms have refinished original hardwood floors, new electrical, new windows and trim, and pretty overhead ceiling fans.


BEDROOM 2:
MASTER BEDROOM:
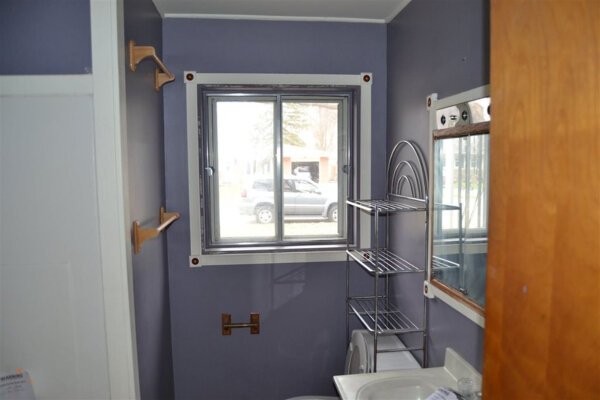
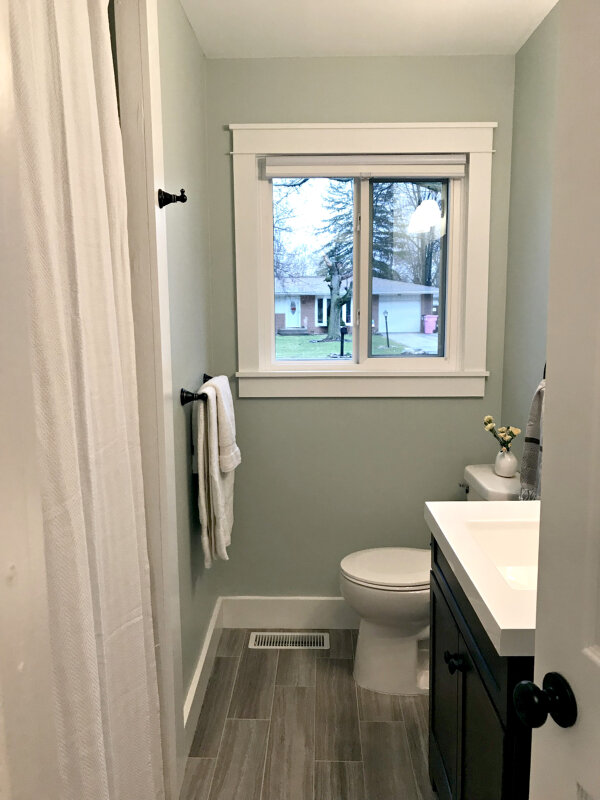
THE HALL BATH:
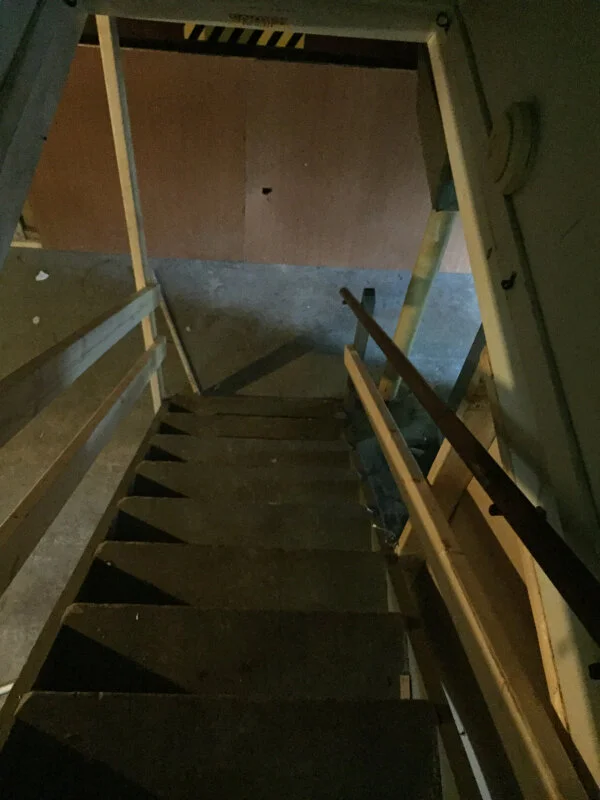
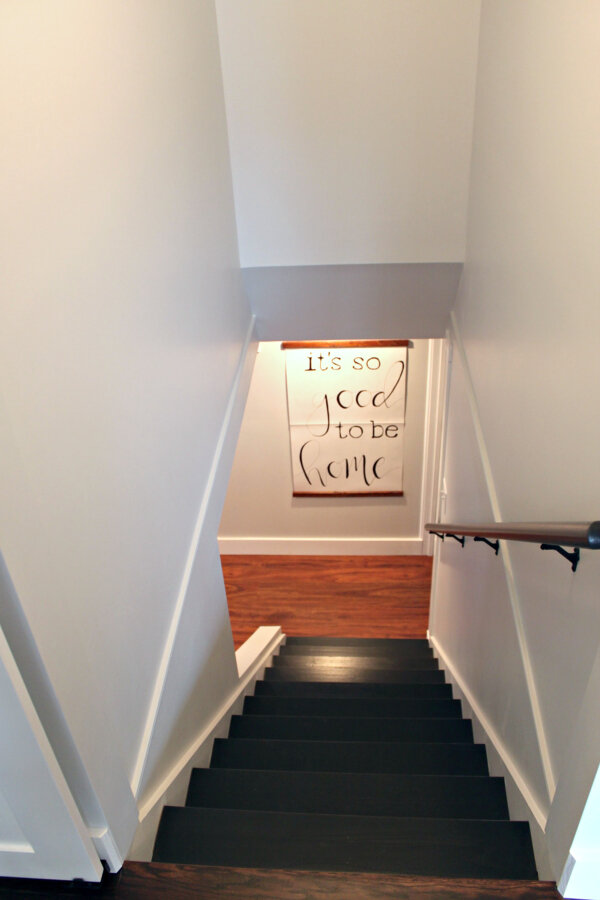
THE STAIRCASE:
Cue the creepy horror music! This staircase was so dirty and wobbly. We completely got rid of it and built an entirely new staircase that is up to code!
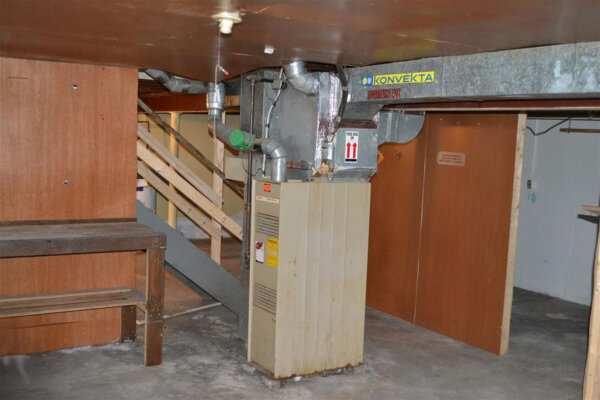
THE BASEMENT:
The terrible before photo really did the original space justice! Scary! Now it’s a large, bright family room with proper electrical, recessed LED lights, new walls, insulation, and flooring.


Another space that doesn’t have a ‘before’ (because it didn’t exist before!) – the new basement bathroom!

This view shows the old furnace on full display and the old staircase. We flipped the stairs and the furnace, then created a closet to hide the furnace from the family room.

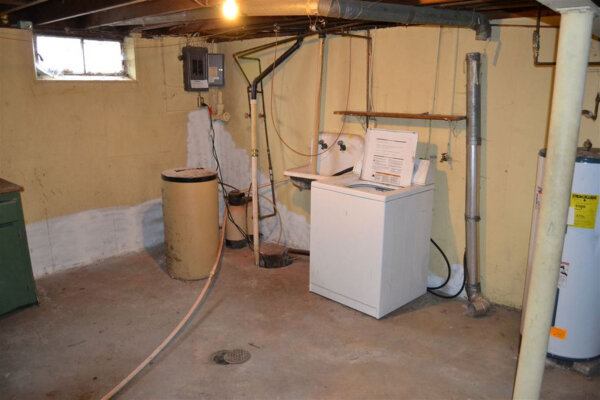
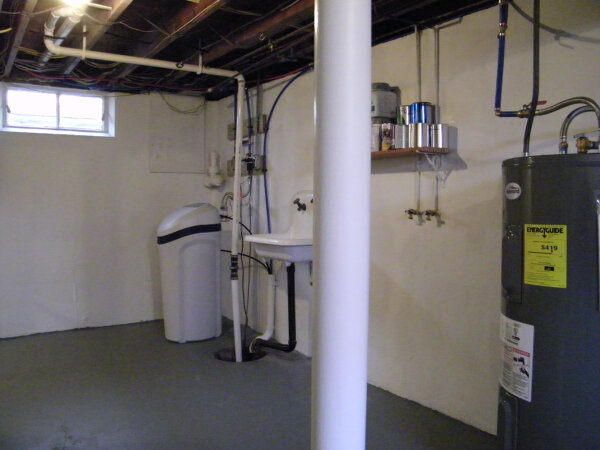
THE UNFINISHED STORAGE AREA:
Nothing glamorous about the after shot here, but it shows the power of paint! The washer got moved out, new water heater and water softener moved in, and the floor and walls got fresh paint. The electrical box moved and was completely redone!
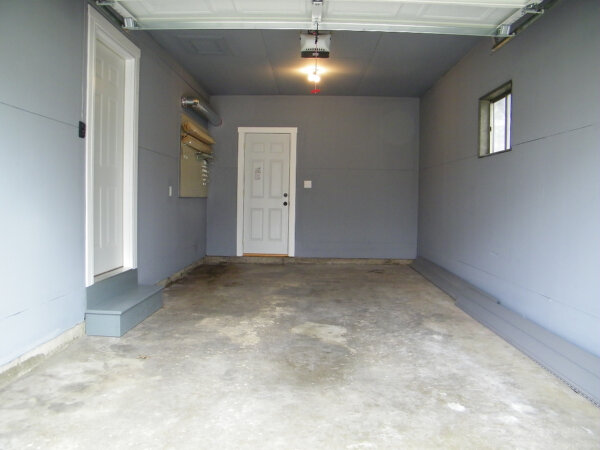
THE GARAGE:
The after might not be trending on Pinterest any time soon, but it’s still a big improvement over the ‘before’.

Thanks for following along as we tackled our first flip project!! It was fun, we learned a lot, and in the end we made a little money. I personally find it interesting to know the true facts about how much money was made on a project like this, so I’m going to share the breakdown of costs and profit in the next post! Let’s just say after spending two years to complete this project we didn’t walk away wealthy! Ha!
DO YOU HAVE ANY QUESTIONS ABOUT THE PROJECT OR PROCESS IN GENERAL? IF SO LET ME KNOW I’LL ANSWER THEM IN MY NEXT POST!