
Green House: 2017 Progress Report
January 14, 2018
Time for a progress report: 2017 was good to the flip!
Here’s where the little house is at:
The basement is done (except for the final electrical work from our electrician). 500 square feet of finished basement, ready for a family to relax in. We added a full bath, finished laundry area, and large family room.
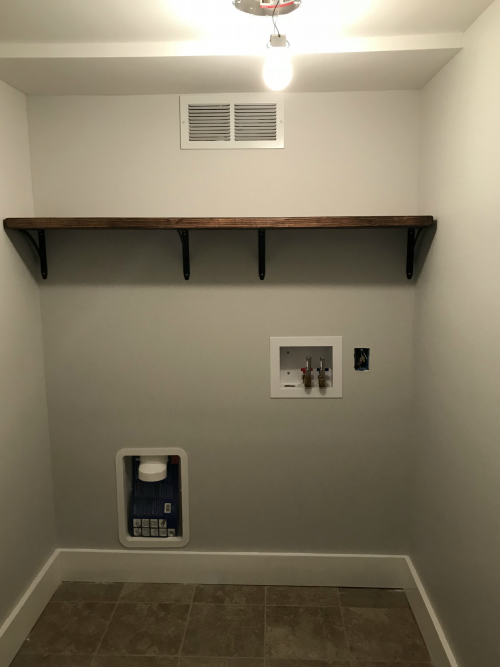
First up: the finished laundry room. The washer and dryer were originally in a dingy unfinished area (water softener on one side, water heater on the other, with the sump pump hole right there to see when washing clothes – EW!) :

Can you say gross?! So we spent the extra money to move the water and duct lines so that the washer and dryer do not involve disgustingness for the future home owners. Now it’s in the finished part of the basement, and washing clothes will be a much more pleasant experience:
We finished the space under the stairs, making a nice finished closet space:

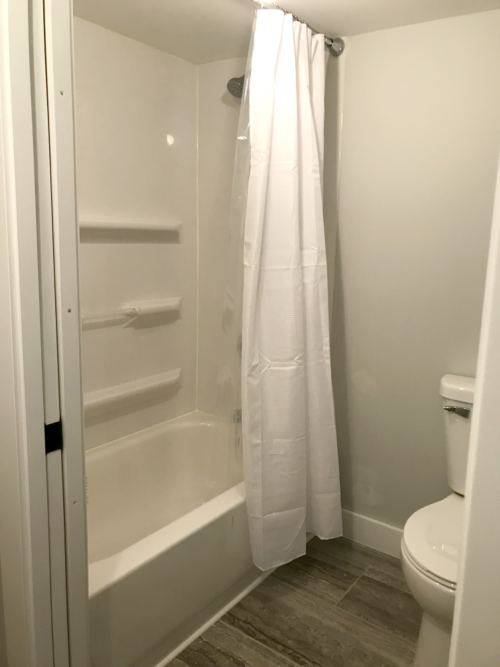
We finished the new full bath:
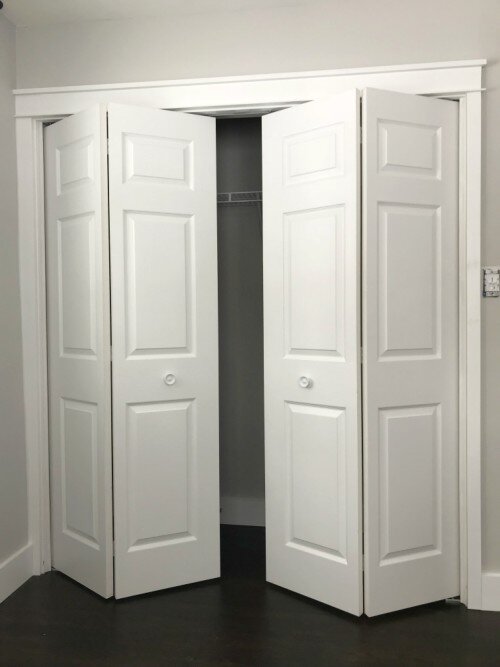
We hid the unsightly furnace with a built-in room (with louvered bi-fold doors to provide the needed ventilation):

And we’re so happy with the large family room! We love that there are so many windows with natural light down here. This picture was taken with the lights off so you can get a sense of the natural light. It’s so bright the mess from the kids is clearly visible. Lovely. 😉

Let’s talk about the flooring:

The laminate flooring is not my favorite color. But it is a high-quality laminate that was on final clearance, and what we’ve discovered through the years is that not all laminates are equal. That “locking” system is complete crap on the cheaper laminates and not only won’t snap and lock well, but also won’t STAY snapped and locked. Thus the locking mechanism and price were top priorities, and when we found a good product at a good price I decided to not fuss about the color being a little different from my tastes.
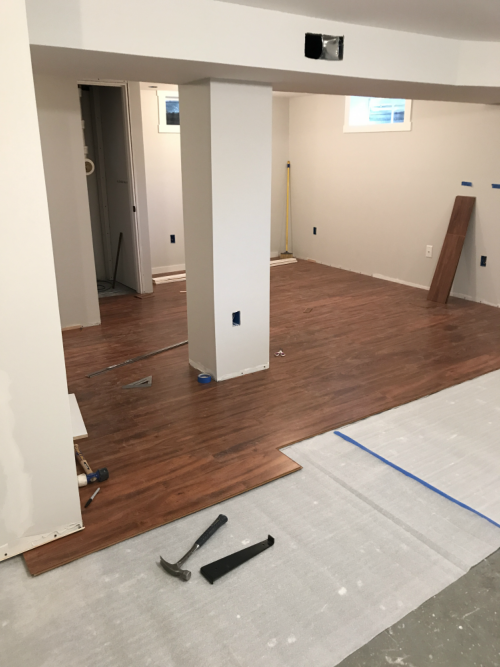
We’ve installed several laminate floors in the past, which helped with the learning curve. I will say I am not sure how a homeowner would install a laminate flooring without a table saw and miter saw. We had a miter saw on site but our table saw was stuck at home – not portable. So just before starting the flooring we decided to bite the bullet and get a portable table saw. As we left Lowes we were questioning the value of the purchase – it felt like a luxury item because we have a large table saw in the workshop at home. However, after 5 minutes of use we had zero buyers remorse. Technically we could have measured for some ripped cuts and taken pieces home, brought them back, and installed the flooring little by little. But the time savings with being able to rip pieces on site was incredible. We both wish in retrospect that we’d had it since day 1.
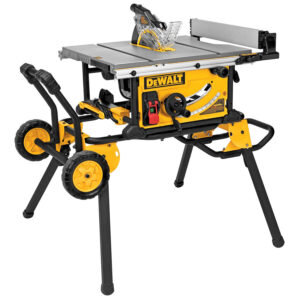
So on the off chance that you ever need a portable table saw (what are the odds, right?), let me share with you why we love what we got. We went back and forth on which saw to buy – one with an attached base that’s collapsible and has wheels:
Or a smaller lighter weight one that needs to placed on your own table:

Ultimately the lighter weight saw seemed easier to move around and store away without the bulk of that attached base. Creating a table for it to sit on was really easy using these fantastic sawhorses (they fold up and can be carried by a handle!). I can move the table saw, disassemble the table, fold up the sawhorses, and fit it all in the trunk of our little Jetta…by myself! Fantastic!

But back to the house…
After we finished the basement we moved on to the staircase and installed the skirt, risers, and treads. The skirt and risers are white, and the treads are a beautiful super dark gray with just a smidge of brown – a color called Onyx. They’re covered with paper to protect them (and still need a little caulk/hole filling work) – but here’s a sneak peek:

And THEN…we installed MORE flooring. The main level had original hardwood throughout, except for the kitchen. We decided to add unfinished oak in the kitchen to match the rest of the main level (and yes, that portable table saw came in handy again!):

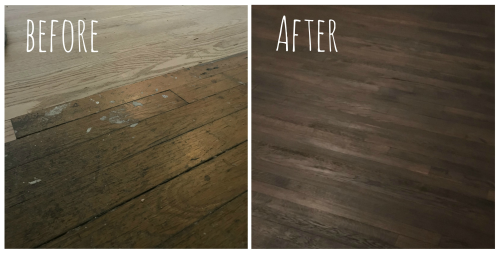
Next up: sanding all the original hardwood, and then staining it all. We’d never done this before, so we were excited to learn! It would take an entire dedicated post to explain every step of the process (and why do that when a million other bloggers have already done it?). But I will share that after trying a few Minwax stains (4? 6? I lost track) and not really loving any of them we got smart and called local pro Hoosier Hardwoods for some advice. After hearing that Minwax has a very high oil content and extra long dry time (and frankly, not even liking the look of them on our sample boards) we switched to this brand:
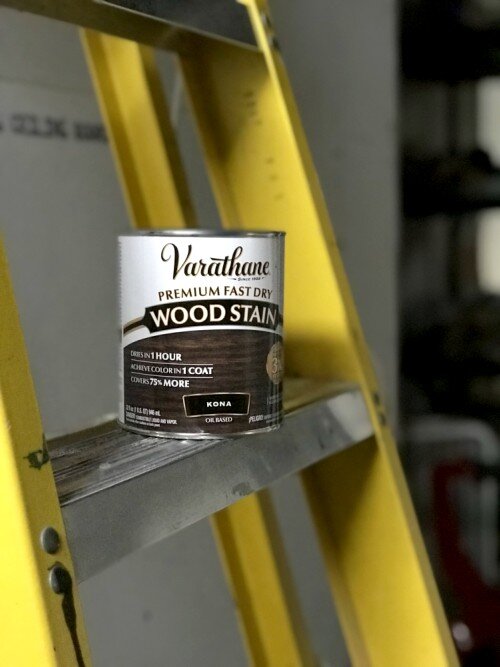
The first sample swipe and I knew it was the one! We loved how it went on, how opaque it was, how quickly it dried – it was fantastic! I plan on using this brand from now on for any staining I want to do.
Once the floors were finished we installed all the bi-fold closet doors, and the casing and baseboards went on. This was a majorly custom job. Many of the casing pieces had to be scribed to the walls and free cut on our new portable table saw.
Now the bedrooms are pretty much done:

Pretty ‘finish’ details are starting to happen now, too. We’ve installed a board and batten wall near the entry. This will eventually get hooks since the front coat closet is pretty small.

We also installed the sliding door that will provide some separation between the main level and basement.

Now the big project is the kitchen!
We’ve installed the cabinets, installed the venting for the range hood, and are working on the custom casework around the range hood.

This kitchen will also get custom casework around the fridge, custom crown around the upper cabinets, some pretty detailing on the range vent hood, a subway tile backsplash, quartz counters, an undermount sink, brand new dishwasher and stove, and some really pretty lighting. I detailed the kitchen plan back in August of 2016. So we’ve come a long way – but not quickly!
So what’s left to do? Here’s the list:
· Final electrical work needs to be completed (by our licensed electrician)
· Final touch-up painting of all trim and walls
· Doorknobs in bedrooms installed
· Light fixtures will finally get installed in the kitchen, living, and hallway.
· The casework around the fridge needs to be built
· The trim around the kitchen window needs to be installed
· We need to install crown at the top of the cabinets
· The counters, sink, disposal, appliances, hardware and backsplash get installed (is it ok to put that in one bullet point? That’s probably a little optimistic…it’s more like seventy billion bullet points when you break down every detail)
· The whole house needs a good dusting
· The scrap lumber needs to be cleared out of the garage, and a little bit of trim work needs to happen
· The water heater and water softener need to be checked out and turned on
· Final inspection needs to happen
And then we move in furniture for staging! ALMOST DONE!*
*not. I’m not delusional, just optimistic. 😉
Looking to give your home a top-to-bottom update? Check out home improvement options over at Wayfair: Hardwood and Laminate Flooring, Door Knobs, Cabinet Hardware, and Chandelier, Pendant, and Vanity Lighting (plus much more!).
Need a little home improvement guidance? Try these guides:
- Hardwood Flooring Style Guide