
Creating a Craft Room
Let me tell you about a ‘new’ room in our home – a sweet little craft room:
But before I dive into this little project, I want to make the declaration that until we have another flip to blog about I’m going to just keep writing about my own house. I hope that’s ok with you all? Hopefully we’ll find another property to renovate soon – without an outside project I get a little stir crazy and start looking around my own house with a wild look in my eye. Ha!
So this craft room happened because one thing led to another…. This fall I shared my daughter’s new room. Moving her into a new room meant we had the old room available to re-purpose, and Bruce suggested we turn it into a craft room for the girls. I loved this idea because when we bought the house from the original owner we were told that the room had been her crafting room. Restoring the room to its original purpose just felt right. And let me be honest – our girls are majorly into crafting and little by little the piles of crafting stuff had collected in every nook and cranny of our home. Getting the piles of crafting crap craft projects moved into a dedicated space was amazing!! You know how in those home organization shows at the end the homeowner has sort of a happy-teary expression and is like: ‘my life has changed…we’re all happier…home is a place I LOVE TO BE…I never knew how much everything was stressing me out…now I’m SO HAPPY!!!” …Well I’m here to say it’s TRUE! That is exactly how it feels to have this dedicated craft room!!! 😀
To get this room converted to a craft room we really only made one big change, and that was to rip out the carpet and put in the same laminate that we recently installed in the new bedroom just across the hall. We wanted the girls to be able to clean up the floors easily and independently – a hard surface floor makes that possible. And crafting on carpet is just not a good idea.
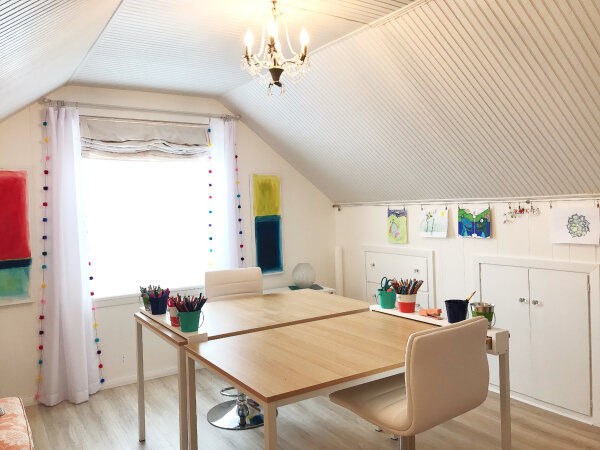
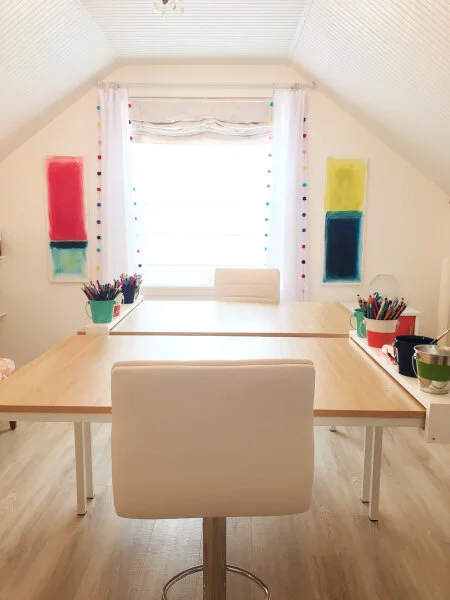
Once the floor was done we added two tables and chairs:
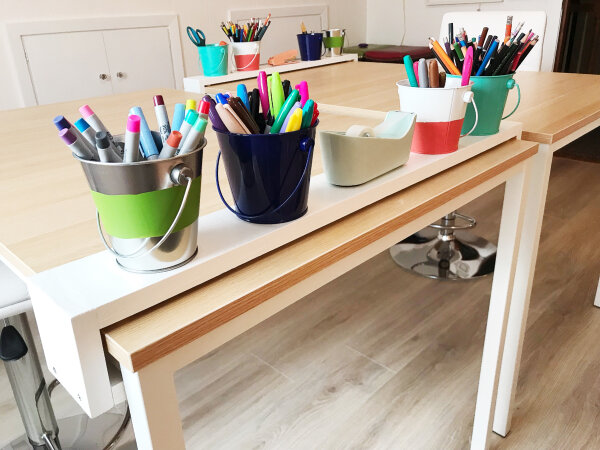
I decided the tables should each have a little sliding tray for craft supplies. We made these for $4 each! The wood was scrap we had on hand so the only purchase for these trays were $1 buckets from Target. I added a little bit of paint to them to bring in a few additional colors and we screwed the buckets onto the trays so they can’t go flying off when the tray is being moved. I love how they leave the majority of the table clear and still provide a lot of storage for supplies:
Because I knew this room would start to produce a LOT of art to showcase I ordered this little cable line for art display. The walls are painted paneling and I didn’t want the girls to start taping things to them. In theory the paint won’t peel… but why risk it? This little cable helps us avoid that, adds some cute dimension to their art and fills up an otherwise empty space:

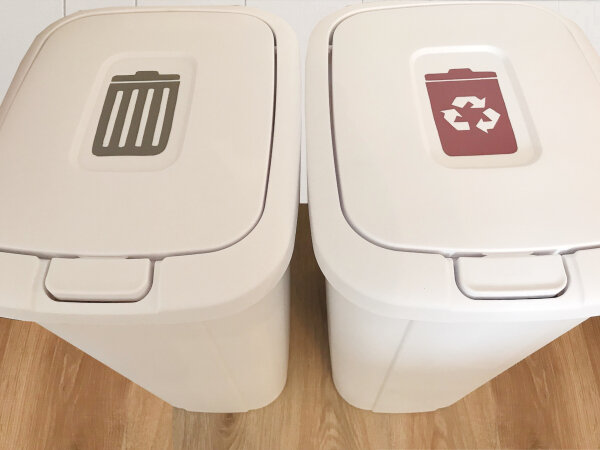
On the more practical side, I knew it was critical that the room have both trash and recycling! So much paper ‘trash’ is created in crafting! These trash cans are nothing fancy but they had a perfect little inset on the lids for me to add vinyl cutouts to identify which is which:
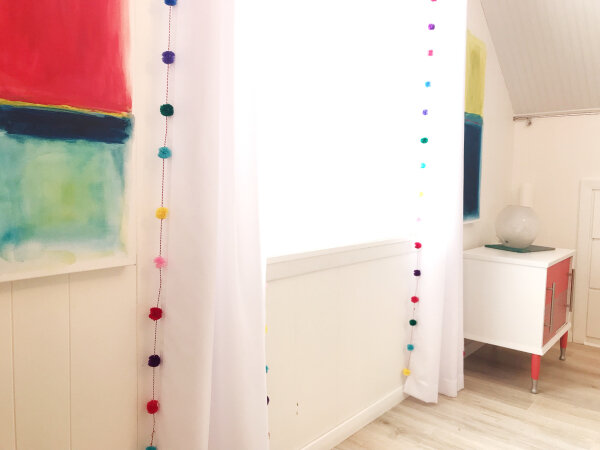
I wanted the curtain panels to be fun but really didn’t want to spend a lot of money on them. To keep it cheap I used $5 panels from Amazon and stitched pom-pom garlands from Target to each side. I love the color and dimension they add – for only a few dollars!
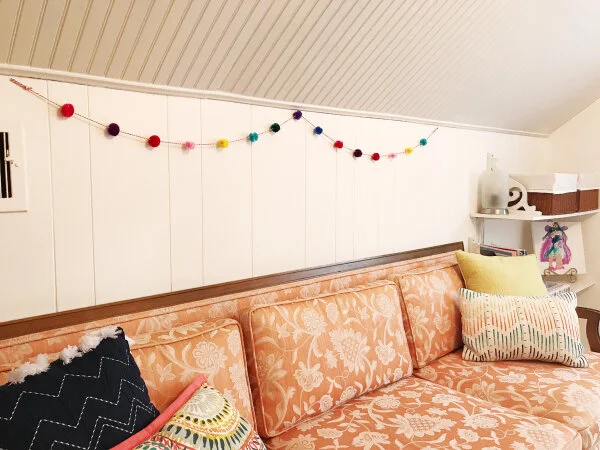
We had an extra garland left over after the curtains were done – the girls decided it would look good over the sofa. That vintage sofa was something we picked up years ago and fortunately it still fits:
These shelves are perfect for holding crafting kits and drawing books, modeling clay and miscellaneous supplies. The best part: each girl has her own set of shelves so no fighting!
For a finishing touch I cut out little banner tags and had the girls create a letter on each tag. Their personalities and artistic preferences are visible in their letter art and it’s a perfect personal touch.

With the room done, the girls jumped right in and started crafting! Which means the pictures you just saw are no longer a true representation of the space, as it is on the way to becoming a hot mess the new location of artistic inspiration and genius creativity:
Now that this room is done, I need a new project. Because there’s no project house at the moment, I am thinking of my own house here. The changes I still want to make to our home include (in no particular order):
· re-doing the girls’ bathroom
· re-doing our powder bath
· finishing my office space
· remodeling the kitchen
· building an addition with a new master bath and laundry room
Clearly, I need a house to flip…and soon! I can’t afford the projects I want to do in MY home until we finish the next flip! 🙂 Anybody have any leads on a flip opportunity in Goshen?? 😀
But seriously – thanks for reading!