
Co-Designing a Bedroom…with a Nine Year Old
Hello everyone. Today I’m sharing a personal project from my own home with you all – a bedroom designed for a growing girl.
A collaboration between a designer and a pre-pre-teen. Our oldest daughter is nine years old, but definitely wanted her room to feel ‘grown up’ because as she said to me the other day:
“I’m almost a teenager. I mean, like, count it…9…10…11….12…13! I’m basically almost 13! And THAT’S a teenager.” and “Mom, I’m feeling really confident that I’ll pass my drivers ed test on the first try. I mean, I don’t KNOW…I can’t predict the FUTURE, but yeah. Really confident.”
Another thing she’s really confident about: being in charge of the design of her new bedroom. To involve her was never a question – it just changed the process a bit. If the idea of involving your child in the decorating of their bedroom sounds daunting, this post might be for you.
THE BACKGROUND
Let’s go back to where the project began. We decided to shuffle our spaces a bit to better use them. We had this big bedroom that we’d designated as a guest room when we bought our home in 2004. Since then we had a couple of kids, and as they’ve grown it’s become apparent that while we rarely have guests we do have kids who have a lot of ‘treasures’, and this bedroom offered great square footage that was basically never used.
The room had become a dumping ground for a lot of old furniture, so we cleared everything out and then took a couple of pictures for you. Here’s the space before:
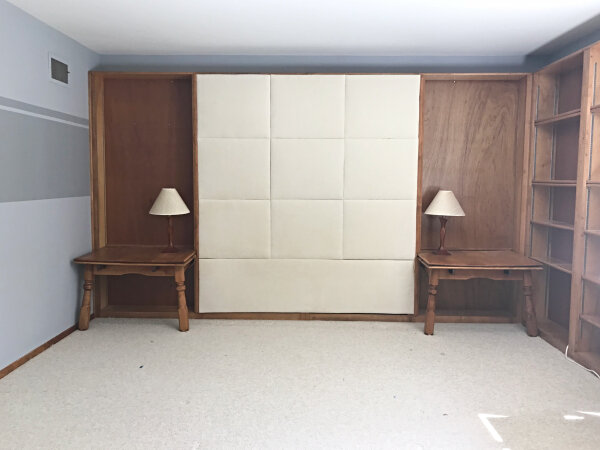
the wall you see when you walk into the room – it formerly had a full size bed under that homemade headboard.
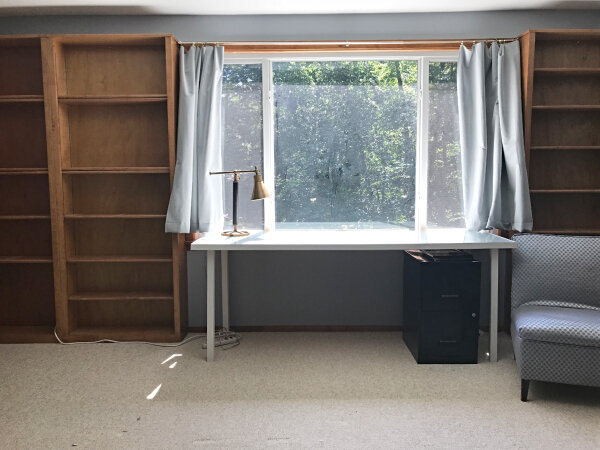
to the right of the headboard wall – window, a desk made from an old door, and more bookshelves.

to the left of the headboard wall – the only empty wall in the room

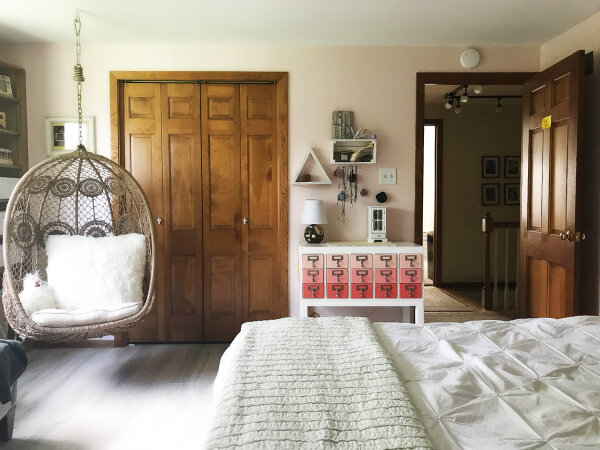
opposite the headboard wall – the entrance to the room and the closet.
The pros of this room:
It’s big. It has a large closet, and a lovely large window.
The challenge:
The biggest issue with this room is all. the. shelves. The first homeowners clearly loved books, and I’m not opposed to a bookshelf or two. But the shelves are 9″ deep (almost useless), and unless you have half a million small books it’s just not practical. That headboard wall actually has even MORE bookshelves hidden behind the headboard I made back in the early 2000s. With all of those shelving units the room really limited layout and function.
THE DESIGN
From a design perspective, the girl knew what she wanted. Here are a few things she said she wanted for the new space: “Mom, I want neutral. Succulents. Earthy. Succulents. Brown, white, tan, gray, maybe a touch of dark green, and a little bit of blush pink. And plants. Oh, and succulents.”
If an image could become a room, this is what she wanted:

Side note: in a child’s room, it’s so easy to ‘theme up’ the room to match the interests of the child. And that’s not always wrong. But I wanted to create a room that was evocative of those key colors, textures and vibe – without making it a ‘succulent themed’ room.
To create that look, here are the surfaces we landed on:
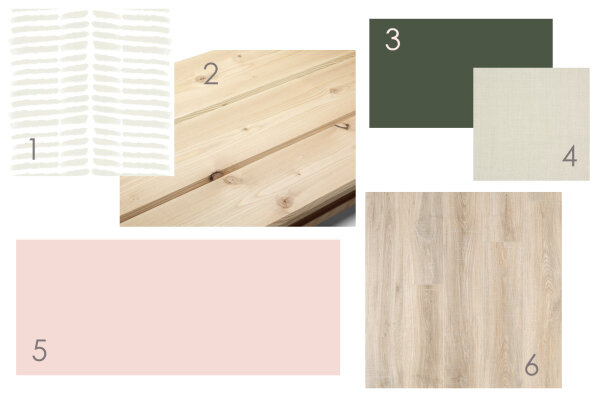
1. Removable wallpaper: I knew some of the bookshelves would stay, and wanted a removable wallpaper to lighten up the back of the units so there wasn’t so much of that wood tone in the room. I narrowed the shopping down to half a dozen that were white and cream, white and light gray, with subtle patterns – and then let her choose!
2. This ‘headboard.’ More on that later….
3. Cabinet color: I’d decided some cabinets were coming into the room, and suggested a ‘succulent’ dark green, which she helped pinpoint.
4. Countertop color: I brought home a handful of laminate countertop options and she chose this slightly textured neutral pattern.
5. Wall color: She decided on blush pink walls and pulled a selection of pink swatches herself at the paint store. We discussed the pros and cons of each and she landed on this one.
6. Flooring: Bruce and I knew we wanted to replace the carpet with a solid surface of some kind – wood, laminate, or vinyl plank. The flooring is one thing we didn’t let her have a say in: we were going for affordable, durable, and well made – AND I wanted to honor the look she was going for – light and neutral. We’ve installed enough flooring to know what attributes mattered most to us, and knew that was a decision we needed to make. We ended up with a beautiful laminate that has a matte finish, a crosscut texture that I love, and it is so light and creamy it contributes to the overall vibe she was going for.
THE LAYOUT
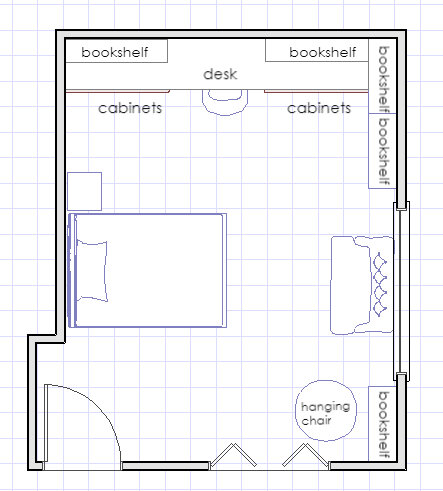
From a functional standpoint I knew my crafting kid needed a large desk, practical storage for her many treasures, a spot to sit and read together before bed, and a place to sleep. This informed the layout of the room – I knew we needed that wall full of bookshelves to function better. I told Bruce we were ripping them out and putting cabinets on the wall with a desk in the middle. The new layout plan:
After ripping out the bookcases, we installed the flooring.

We purchased unfinished in-stock cabinets from Lowes and installed and painted them. We added the countertop she selected (12′ long! We had to bring it in through the second story window using two ladders in the yard…that was fun).

And then we got to work re-using those old bookshelves. Bruce cut down two of the bookcases to create units resting on the countertop. A third bookcase was reinstalled in the closet for shoes, and the fourth bookcase got ripped apart (literally…by a table saw, ha ha) to help customize the other units to work in their new configurations.
THE DECORATING DETAILS

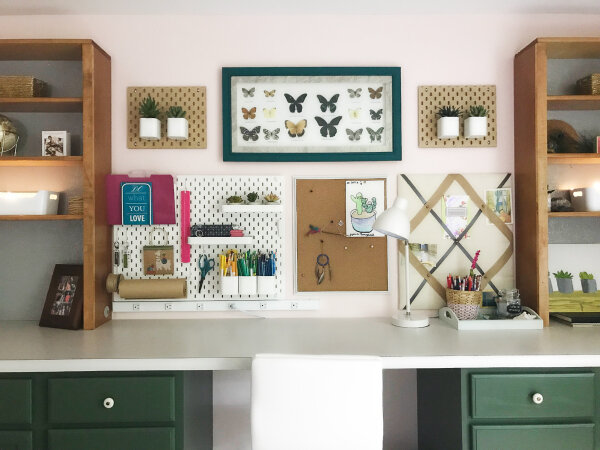
1. Desk organization: As soon as I knew there was a desk space involved, I wanted to create an office gallery wall. I sketched it up to scale to see what pieces I needed, and then planned a trip to Ikea.
2. Cabinet Knobs: I set the girl loose in the cabinet hardware section of Menards, and told her to pick knobs for her new cabinets. I literally didn’t limit her in any way – just said she should pick whatever she wanted. She chose this crackle porcelain + old brass knob that was perfect (and happened to be on clearance – awesome!).
3. Window treatments: these beautiful embroidered lightweight curtains were her choice. But you’ll notice they’re not in the room; practicality changed our minds. We decided we’d rather get something room darkening that’s mounted from above (a solar shade, roman shade, something along that line). That’s the one part of the room that’s not done yet.
4. Lots of beautiful pillows that fit the theme were selected – some I found, some she did.
5. Form and function: After reading many reviews on many different fans, I went with this gorgeous one. Because there is no way to add an overhead fan, this heavy duty guy offers the second best thing – and it’s pretty!
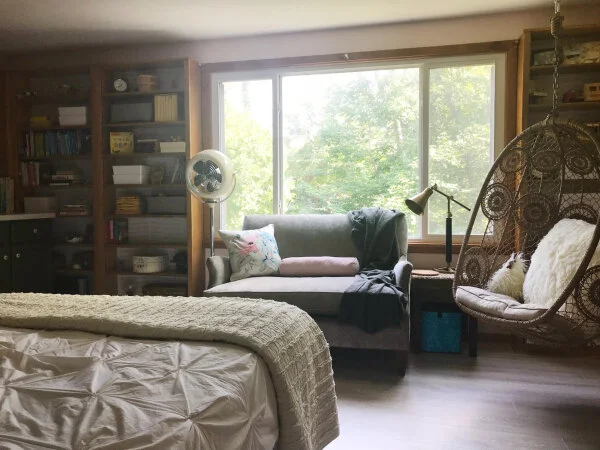
6. This was a surprise for her! She desperately wanted a hanging chair, and we found this on sale and it was just too perfect – we couldn’t resist. We hid it until the last minute and assembled it along with her entire room one night when she was gone; she was over the moon about it the next day when it was all revealed to her!
7. Seating: On the more practical side, this loveseat was something we already owned. We’d used it for staging the flip, so it was sitting around taking up space and was perfect in color and size for her new space.
8. Headboard: For the most part, my girl trusted me and the room decisions were easy. But the headboard was not easy, and this is where co-designing with a kid took some time and patience. She had her heart set on a headboard of 2x4s. Literally. She wanted unfinished raw 2x4s stacked up the wall. Bruce vetoed that. Between the inherent dirtiness of 2x4s, the potential for splinters, the weight on the wall, and the side profile view (which she wanted left unframed so you could see the end of every board) – we just were not feeling it. I suggested shiplap. “Mom, that is NOT the feel I’m going for.” She suggested rustic plank walls. I vetoed those – there’s enough wood in the room! I suggested an upholstered headboard. “Too boring.” I found woven headboards. “No.” I suggested a paint treatment. “Not enough texture.” AAARGH! We could NOT find a solution until I suggested hanging a rug as a headboard. She was intrigued. I went over to Worldmarket.com and started hunting. My criterial: lightweight, interesting visual texture that fit the style of the room, neutral, and affordable. I narrowed it down to three, and she chose this one. Whew!
9. And of course, bedding. This duvet cover was something we already had, and we added a blush pink pillow and succulent green pillow to tie the colors of the room together.
So are you ready to see the room already?!
I’ll share the before shots one more time so you don’t have to scroll back up:

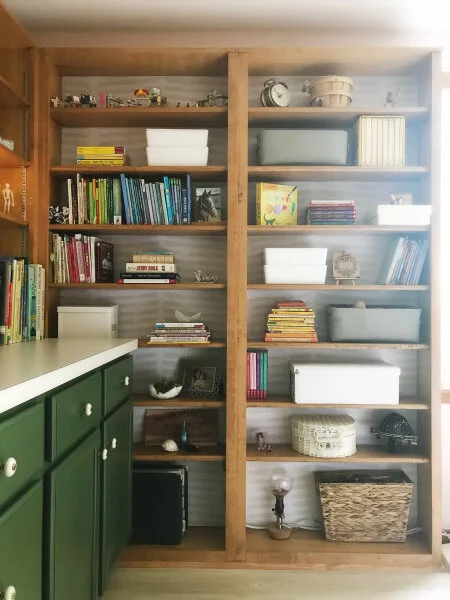
The wall that used to have a headboard is now full of more useful functional storage and a large countertop work space. You can see the re-use of the old bookcases, cut down and placed on top of the cabinets:

This little gallery wall was fun to create! She already had the framed butterflies, we had a piece of corkboard lying around, and the ribbon pinboard was one piece of the old headboard. The only new items for the wall were the pegboards and accompanying accessories:
The wall with the window still has bookcases, along with the loveseat, fan, and a new hanging chair (her favorite thing in the room). It will get a new window treatment – coming soon:
The reality of leaving so. many. bookcases in this room is that no matter how I style them, it just looks cluttered. As you can see, I found a lot of little storage totes and boxes to help with this, but it’s still too much stuff for me. But it’s not my room, and for my 9 year old, this stuff is special and she’s happy to see it:
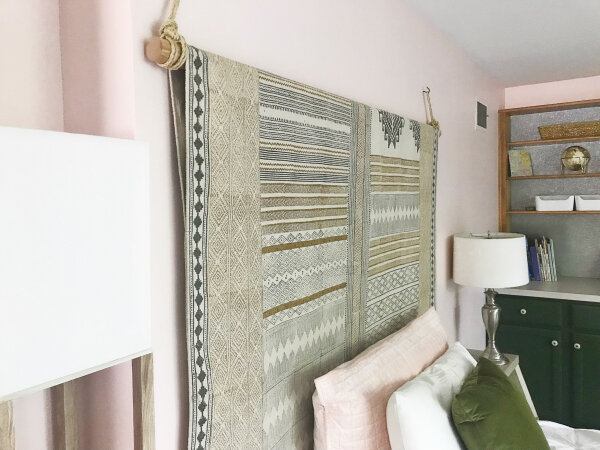
The wall across from the window is now the headboard wall:

The area rug headboard really looks nice in real life – a lot of visual texture without being too crazy. I love the simple way we decided to hang it. We used a length of handrail from our local hardware store and wrapped rope around the ends, then looped it through hooks. So simple! Of course, we took a few extra steps to be sure it wouldn’t fall on anyone’s head! To ensure that movement from pillows wouldn’t result in one end slipping out of the rope we drilled a hole through the wood first and looped the rope through the hole to start. We made sure the little wall hooks went into studs, and I used a little thread to tack the edges of the rug together so it doesn’t slip down and off:
The closet wall didn’t have room for much, but we were able to bring in the old library card catalog she’s always had; perfect for all of the little things she collects:
The room is full of little items that she grouped together thoughtfully:

And there you have it! A new room, designed hand in hand with a 9 year old.
I anticipate this room working very well for her all the way through her teen years, which are ‘basically almost here’, you’ll recall. But as long as a stuffed animal or two are still on display I don’t have to worry about her growing up too fast, right? After all, Spice (the fluffy chicken she keeps in her ‘egg chair’ – ha ha) looks like he’s here to stay:
