
Playhouse Reveal {Part 1}
June 21, 2016
The playhouse is done! *
*Ok, truth: it’s not tooooootally done. The deck will get a dark stain next year (after the treated lumber has had some weather exposure). I might also add a mailbox and entry mat. And a friend suggested putting house numbers on it: our house number with ½ added at the end…how cute is that idea?!
Now with that disclaimer out of the way, let’s get into the ‘finished’ playhouse! I was going to post the entire project as one post, but it was just getting too long! So today I’m sharing the exterior with you, and in another post I’ll show you the inside!
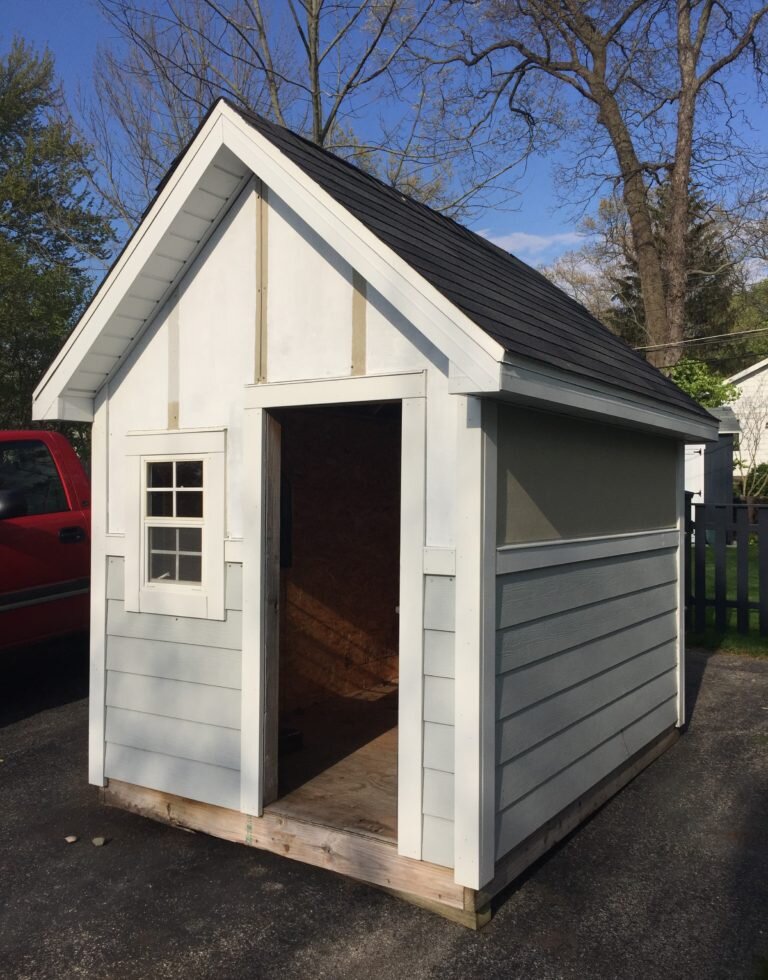
As you know, we started with a craigslist find. It was rough (inside and out) but was built well and I loved the shape:
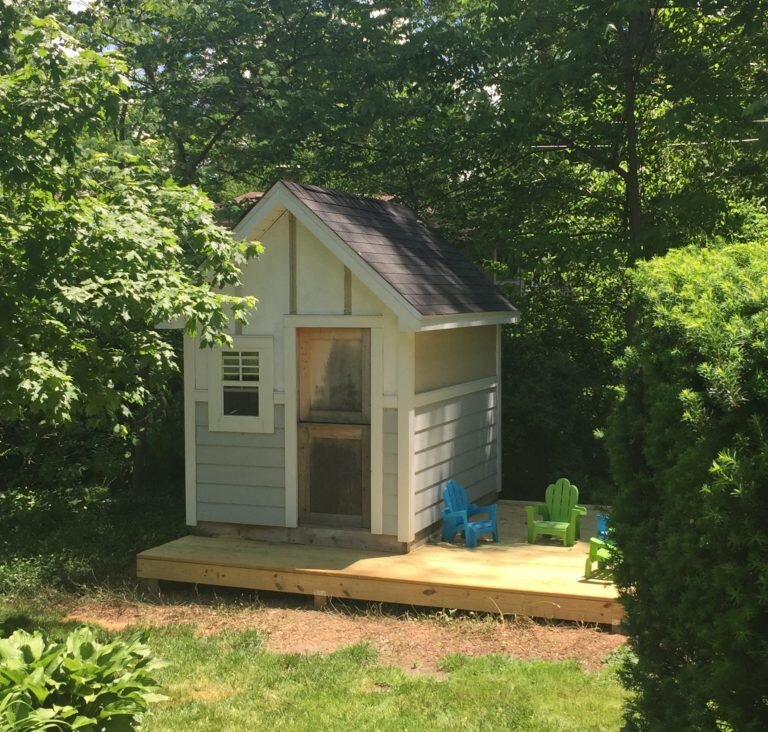
We added a deck in our backyard and got the playhouse up on it:
And then we got to work…and ended up with this!
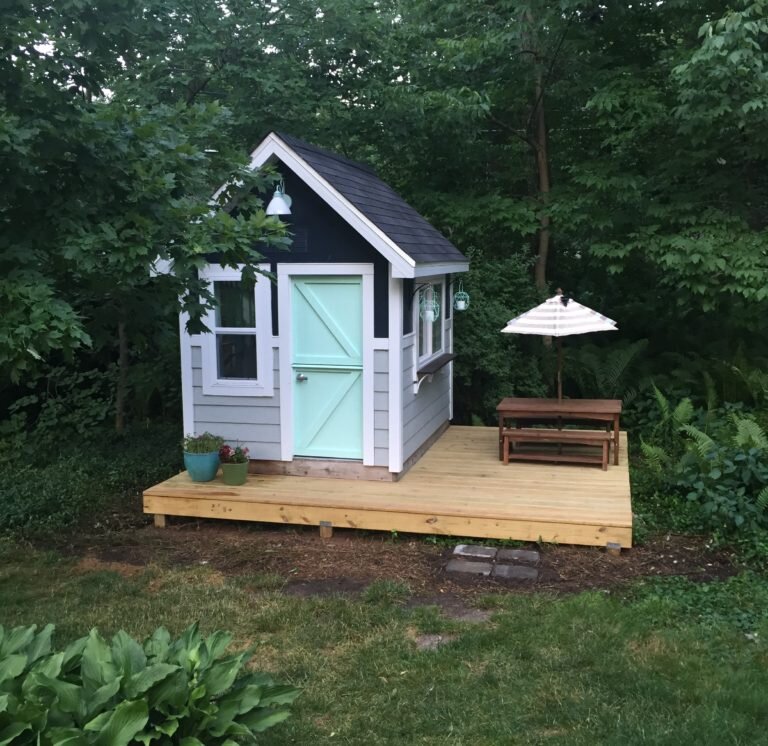
One of the first things you may notice on the exterior is the color choices. The bottom siding stayed the same. It’s Hardie Board siding and will be maintenance free – why mess with a good thing, right? The top half we painted the same blue-gray that’s on our fence, shutters, and shed. I don’t have the exact color (it was a custom match to what was on our shutters when we bought the home) but a close match is Sherwin Williams Gale Force.

The door color could have gone many different directions, but when I saw these cute little lanterns at Target I knew that was what I wanted (and thankfully my girls agreed).

If you follow me on Instagram, you saw this lantern with a myriad of color chips around it. I ended up choosing Benjamin Moore Santa Barbara Green. I did have the teensiest bit of trepidation that it would be too bright…but I’m happy to say I love how it looks on the door!
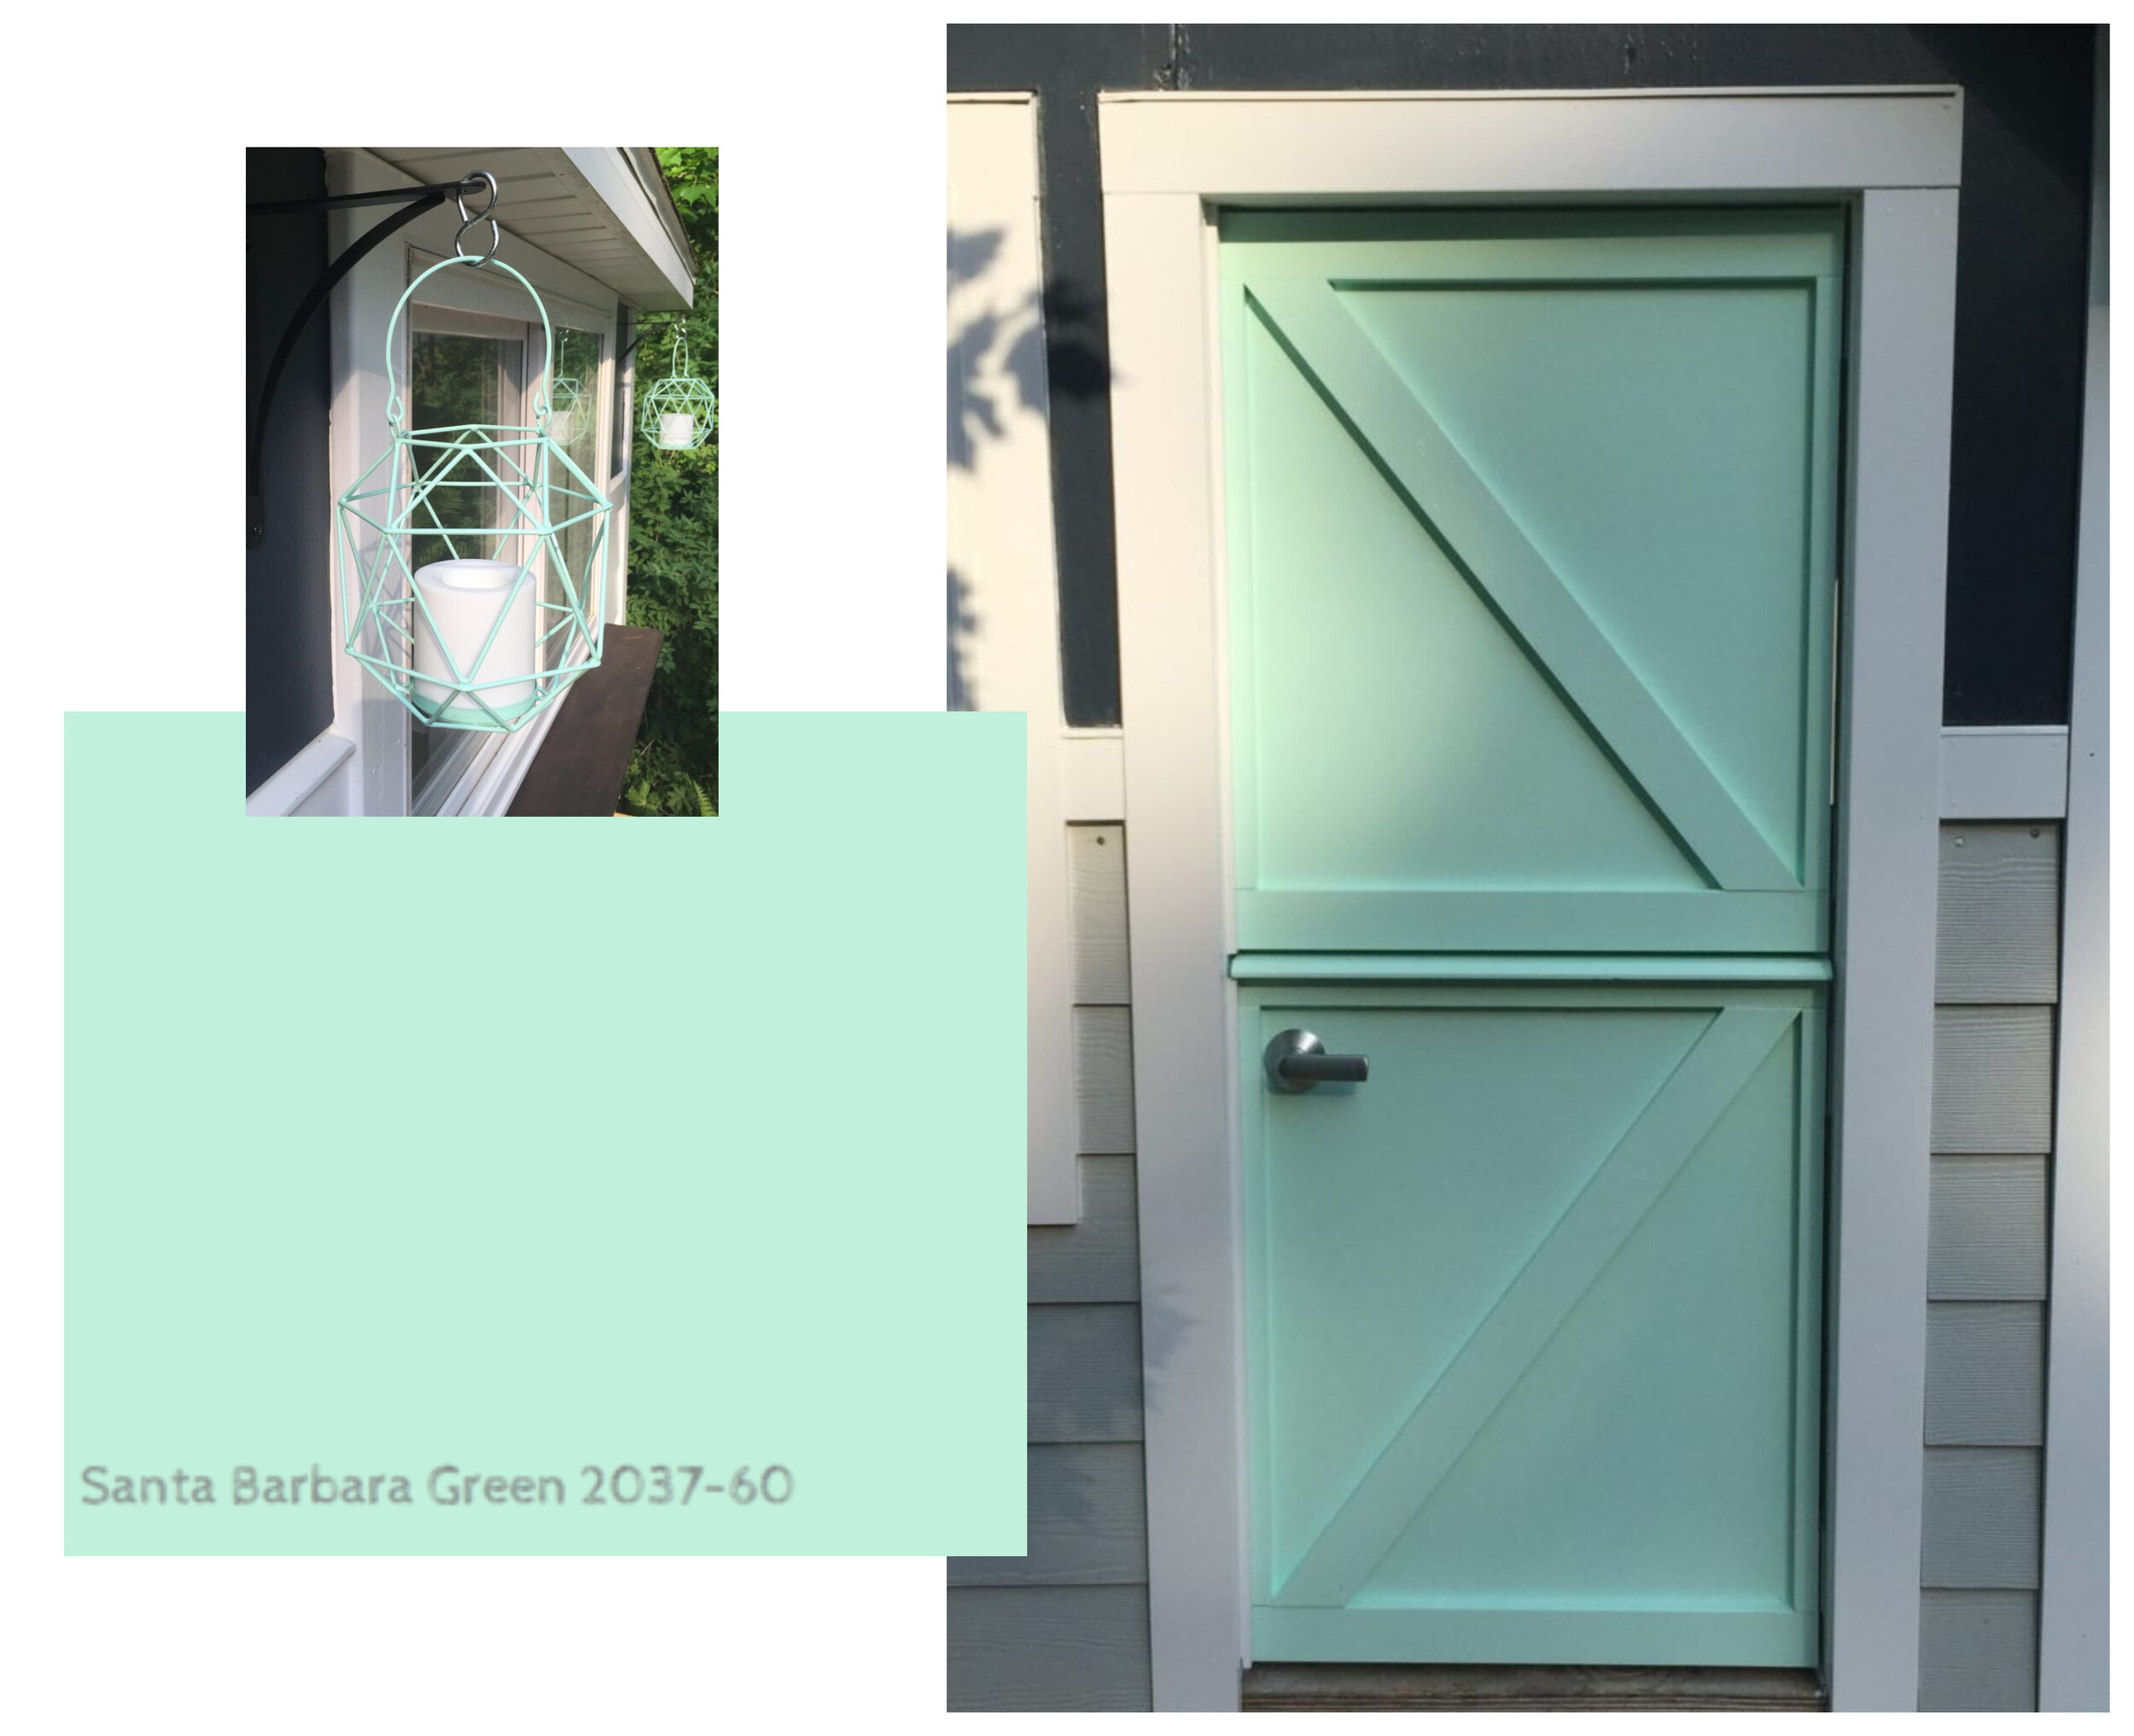
And speaking of door: the original dutch door was a plywood hack job that was falling apart, so we used it as a size template and then threw it out. The new door is made from a $1.00 (!) door from the Habitat Restore. Bruce cut it into two chunks, added scrap trim we had already, and installed a handle (also from the Restore). We put it back up on the hinges that were already there. A nice detail that he added was the interior hardware so the door can function as one unit or be easily separated if the kids want to use the dutch door feature.

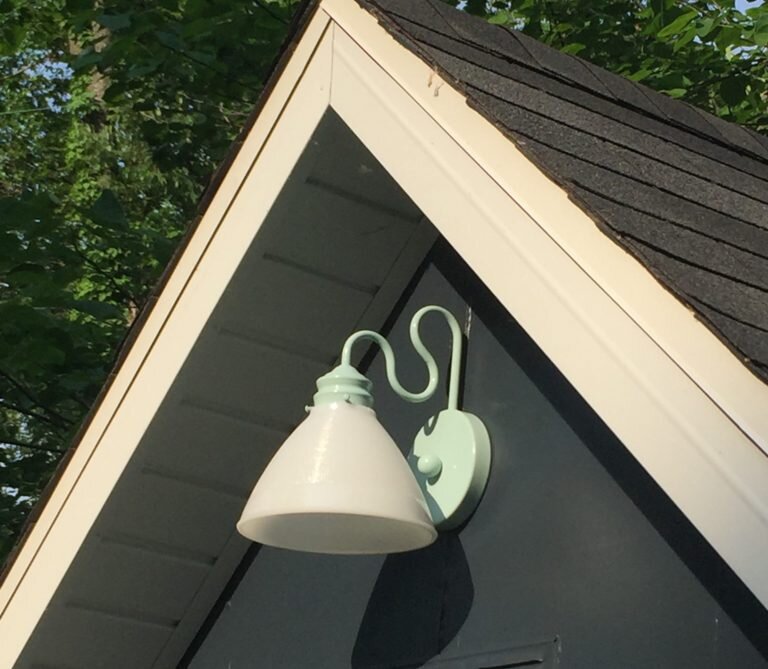
Above the door Bruce added an $8.00 light fixture I found at the Restore. Sidenote: can you tell we love the Restore? It’s perfect for projects like this! But the light: it was gold, and had a hideous shade, but had such a great whimsical shape! I picked out a different shade that fit the fixture and they let me swap it in at no additional cost. The light got a few coats of spray paint and was ready to install.
The last big change to the exterior (and interior too) was windows. The front window was 12×18, and we upgraded to an 18”x36” window. In order to get the right size we bought a new window for this spot. At $50, it is the most expensive item we bought for the exterior. On the side of the playhouse facing the deck there was originally no window. We found a large single-hung window at the Restore ($20!) and installed it on its side to create a pass through window. The hanging lanterns and a little serving ledge finished off this side. We love the light (and the air flow) this brings inside!

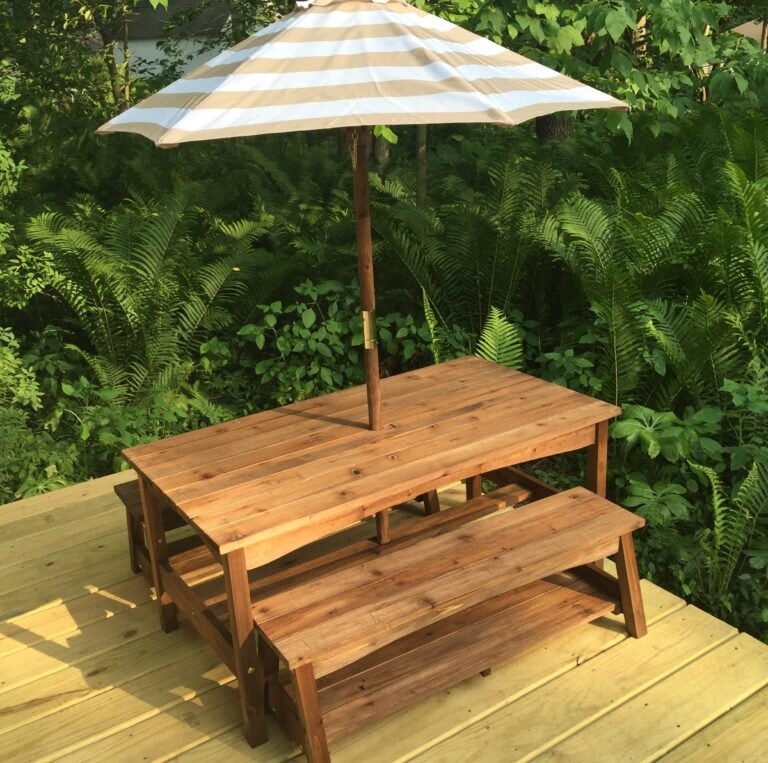
Of course the deck around the playhouse was just begging for some kind of table, and Bruce’s parents found this adorable table here and gifted it to us. Perfect for the space, right? I just love it!
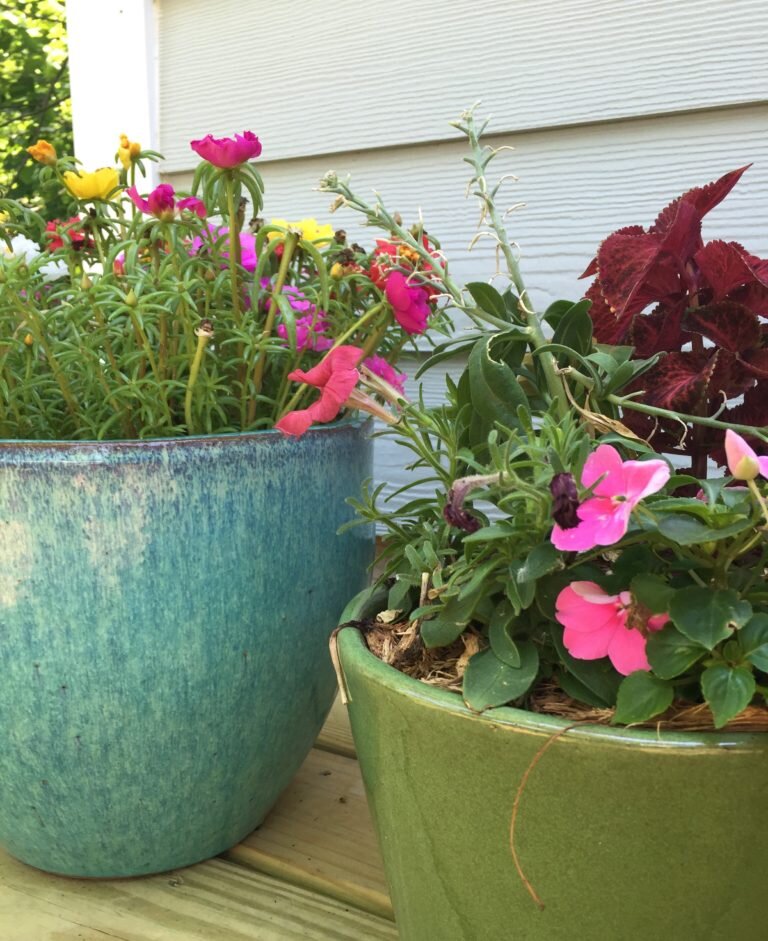
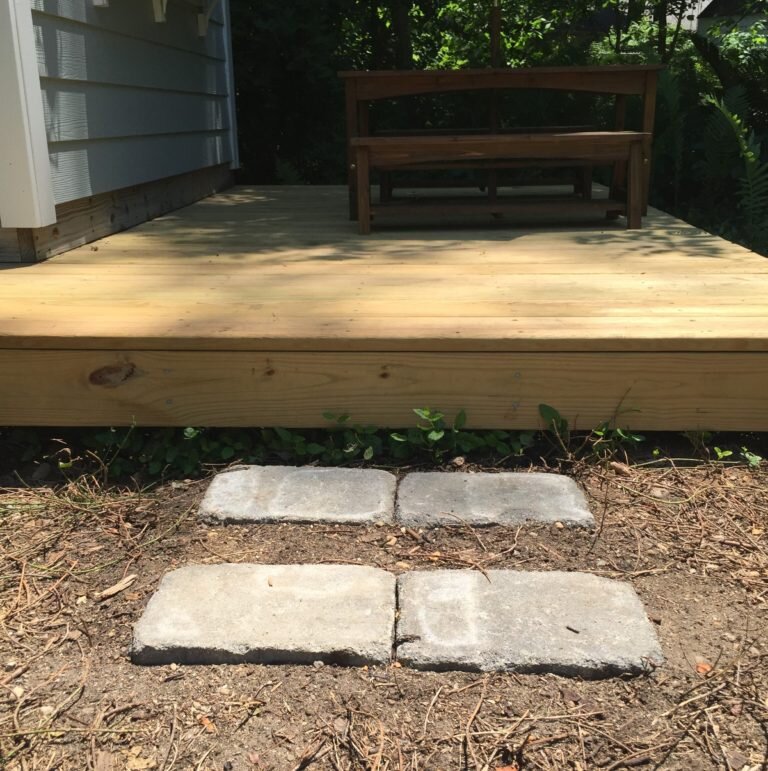
Next to the door we added some flowers, and Bruce laid some pavers in front of the deck so the girls have a designated spot for coming on and off. We’re hoping that if we keep foot traffic off the surrounding ground the ivy from the woods will grow back and fill in the area in front of the deck (fingers crossed).
And finally, here’s a panoramic shot of the backyard. This gives you an idea of where the playhouse is in relation to the fence and shed (far left – both are painted the same dark blue-gray) and the swing set and pergola (far right – both are stained the dark brown that will eventually be on the deck). We’re really pleased with how it fits into the yard – it feels like it was always meant to be here!
