Office Design (On a Dime)
This post was sponsored by Wayfair
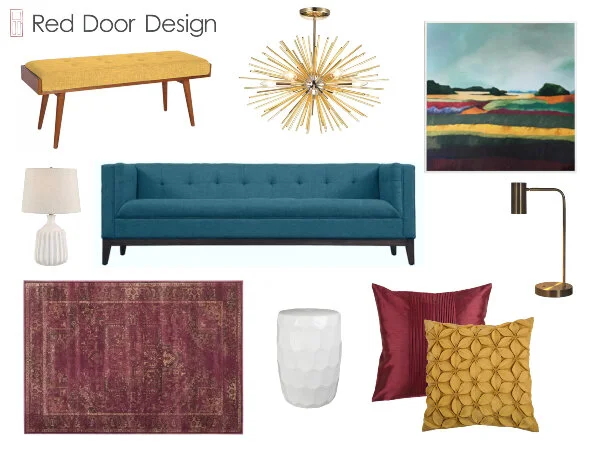
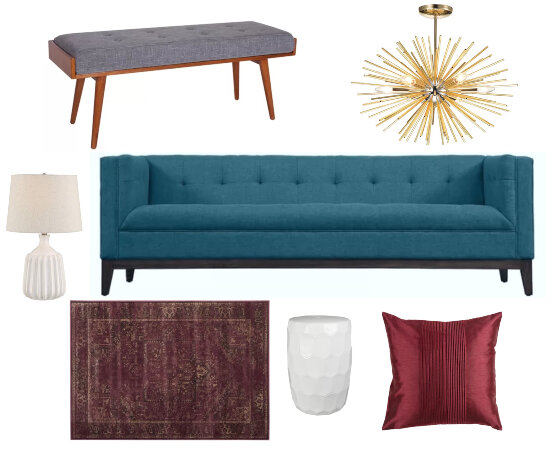
Back in the heart of winter I shared a mood board on Instagram, full of pieces I loved individually and as a group:
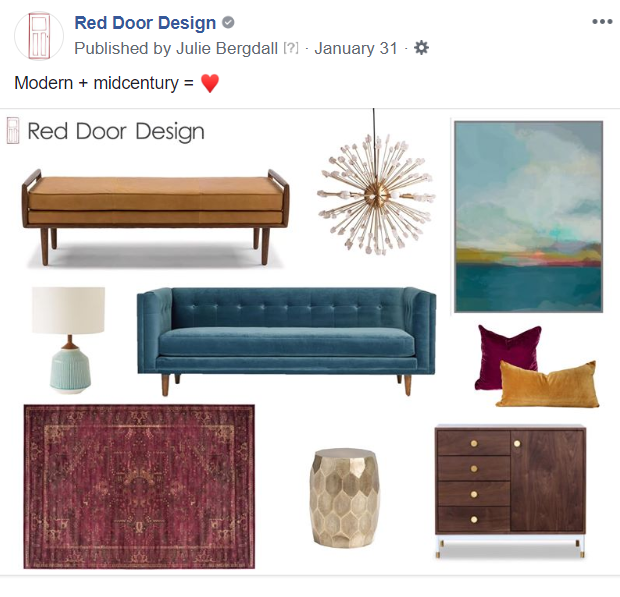
I was craving these deep saturated colors, the richness of the gold metallic, the combination of a little mid-century with a little modern with a little glam.
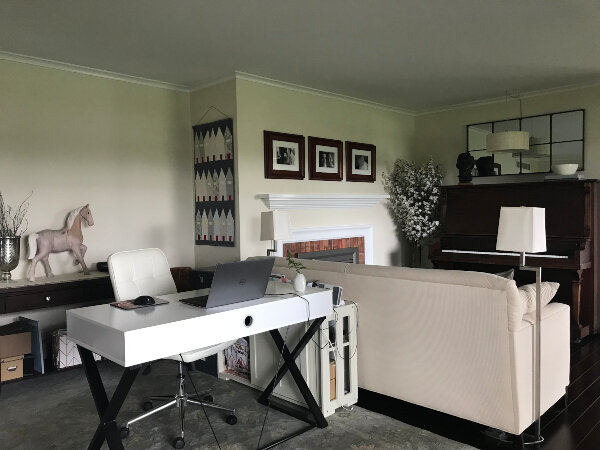
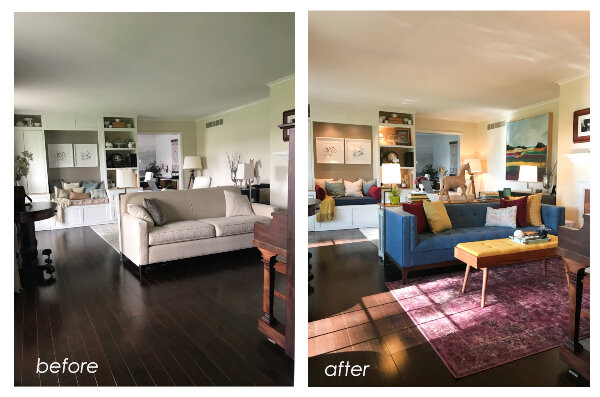
I think it was calling to me because I’d just moved my office into what used to be my formal living room, and after shuffling the furniture to fit my desk in the space I was working in a brown and cream space:
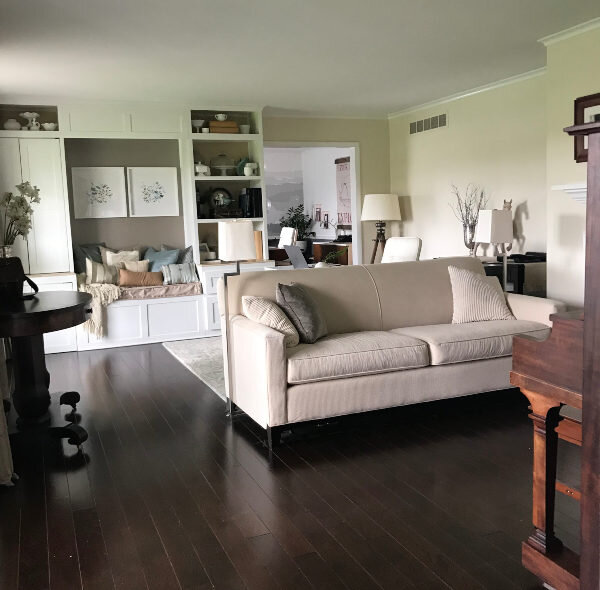
I liked that my desk was effectively hidden by the sofa, and the new space was relatively functional. But it was just so dramatically neutral – and not in a good way.
Part of me wanted to buy everything from that mood board. But those items totaled over $6,000! I just couldn’t justify spending that much on my office space. After all, as my much more thrifty spouse said: “it works.” 😐 So I just tried to leave it at that.
I made it three months. The space was driving me NUTS. I realized I really need my work space to feel finished. I work better, I am more comfortable inviting clients into my home, and I find a well decorated room brings me a lot of daily satisfaction and joy. So I got to thinking…could I get the look for less?! After all, the sofa is more for looks or occasional use than anything – no need for something expensive there. The art I could make, some of the items on the board probably had cheaper ‘look-a-like’ versions elsewhere, and the cabinet was really not needed (though I solemnly vow to own something from Hedge House Furniture someday – everything they make is gorgeous – and they’re local!).
I jumped over to Wayfair and started shopping. I found a few items that worked – sort of – and started building a mood board.
The good news: everything on this board totaled $1348! Much better! But as you can see, the look isn’t quite as spectacular.
The thing about ‘getting the look for less’, as a concept, is that it doesn’t translate perfectly. In order to make it happen, I realized I’d be doing a lot more DIY. I knew I’d need to modify the chandelier and bench, and create art from the inspiration board.


In addition to those larger projects, I needed to bring in a little more storage, bring in a little more gold and light blue, and carry the new look over to this reading nook:

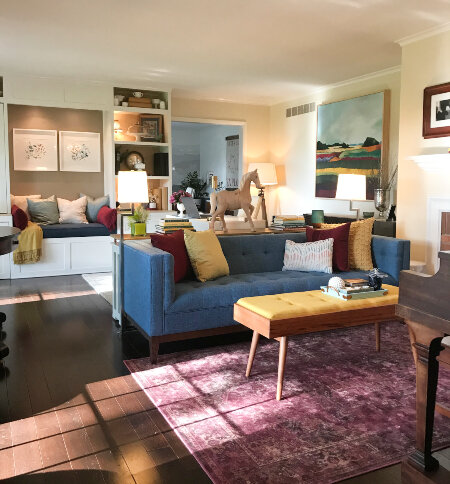
After a few months of painting and hot gluing and sewing and building and decorating…the room suddenly feels RIGHT:
The first new piece to come into the room was the sofa:

So let me be honest. My first thought when I put the new sofa in place: crap. it’s really low. I measured before purchasing, of course, but didn’t really think through how different it would be to have my desk area so exposed from the front door. After staring at it for a day or two I figured out the solution. I solved it by buying a second storage cabinet to go with the one I already had next to my desk and purchasing a piece of wood to put across the top so the whole unit looks like a console from the door.

I think it serves as a great reminder that anytime you’re considering bringing a new item into your home (especially if it’s a bigger piece) you can’t fully know how it will look and feel and work for you until you get it in there. It might work perfectly, it might work with some creative thinking, or it might not work. In this case creative thinking saved the day. (And I got some additional storage out of the deal 😉 )

Of course having a 7′ long console table means having a 7′ long surface to decorate! The wooden horse was passed down to me by my grandparents, the books were all finds from the local thrift store or books I already owned, and the diffuser and little plant finish off the décor.
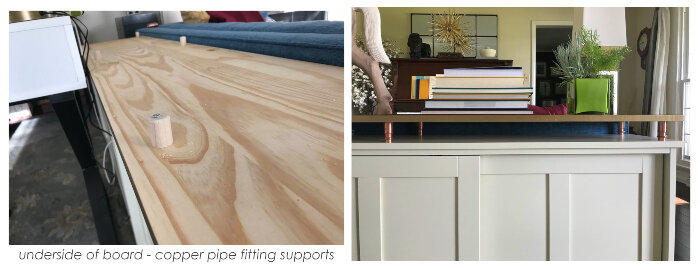
I created a little secret storage spot too, since I can’t really use the top of this surface for desk stuff anymore. At the last minute I decided to elevate the board a little bit, creating this area to charge my ipad and store a few project files for my current clients:
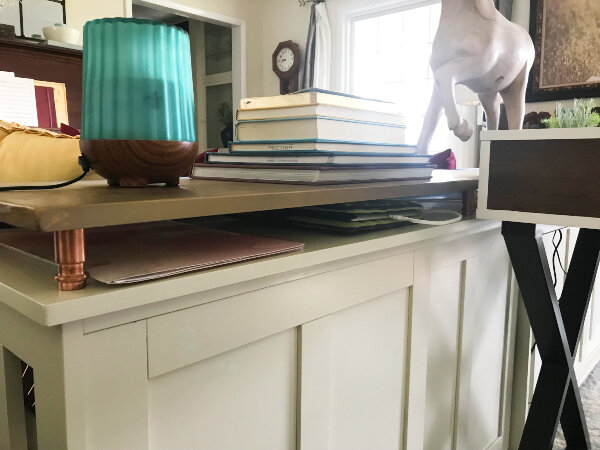
I found some copper fittings in the plumbing department that were perfect little ‘legs’! To create the support for these I simply cut some dowel rods and attached them to the bottom of the board, then slipped the pipe fittings over them.
Back on the other side of the sofa…
I rolled out the new rug in front of the sofa, and layered my bench ‘coffee table’ on top of it.
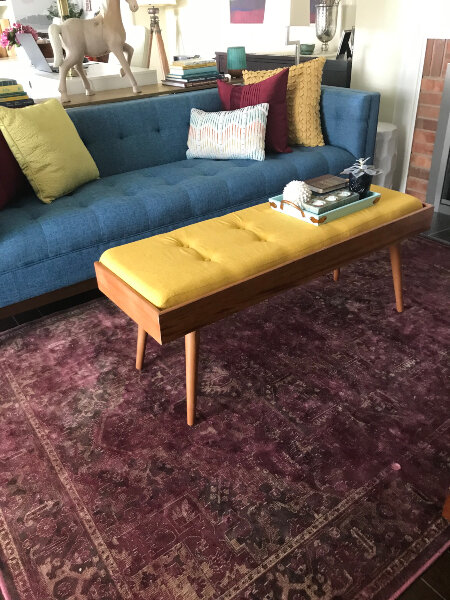
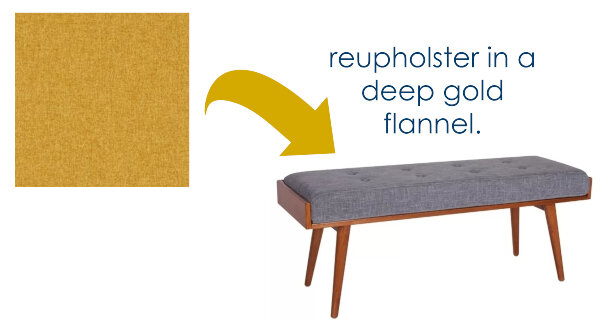
In my hunt for a ‘get the look’ coffee table I couldn’t find one that was perfect. This Wayfair find didn’t come in a yellow that matched my original board. But because of the size and the way it matched the look I was going for, I decided I’d get it and just recover the cushion. Normally I wouldn’t have a brand new item recovered, but I needed that pop of yellow to contrast the rug and sofa, and the original fabric wasn’t working with the sofa color. Now that it’s the right color I’m really happy with it, and all it needed was a little tray of accessories to finish the look.

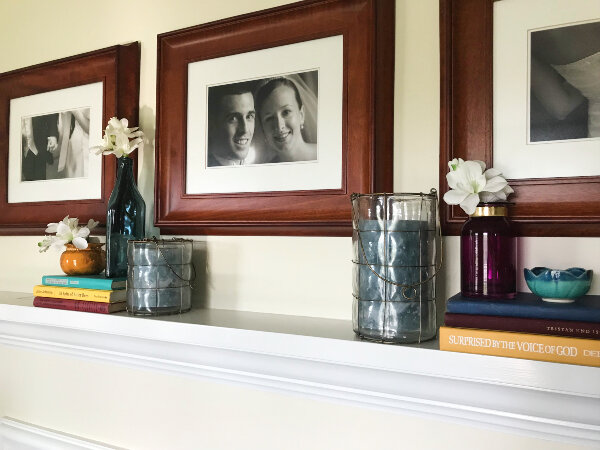
I sprinkled my new colors all over the mantel with some thrift store books, vases, and the candle holders I already owned. Side note: those pictures from our wedding were hung over the mantel when we were 24 year old kids just moving in…and I don’t plan to ever take them down. Some day when this house sells the new owners will see the faded outline of the missing pictures on the wall in this spot and criticize us for never changing the art – ha!
The piano got a new layering of music that we already owned, and the gorgeous sunburst pendant provides functional light for the musician and also looks so pretty reflected in the mirror behind:

I had my fingers crossed that I could ‘get the look’ of the first inspiration chandelier with this inexpensive light from Wayfair. I bought some polished crystals, used a little hot glue to attach each stone to a dowel, then slid each dowel into the empty metal end of each spoke of the light. A super simple DIY, and it worked!

This antique library table came from my aunt and uncle, and I filled it with more books, a little planter filled with some faux flowers, the beautiful lamp from the mood board, and an old leather satchel.

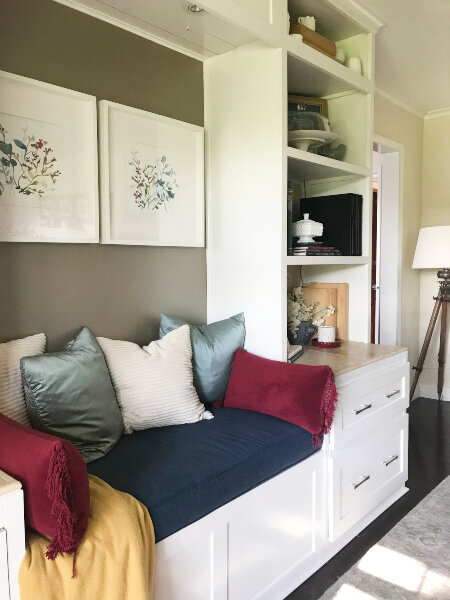
Across the room, I brought a little bit of the new color scheme to the reading nook. I had my upholsterer re-cover the seat cushion, and then brought in a throw that I already had. I already had the lumbar pillow inserts, but needed to bring in a bit of that red to this side of the room. I got lucky and found some fabric at Goodwill which worked perfectly for the new pillow covers I sewed. The art was already there, but doesn’t it look even better now that you can see a color connection below?
My desk was in need of only one thing – a desk lamp. This little beauty was perfect because it brought in another touch of gold without being too bulky or competing with the horse beside it.

Behind my desk I’m sure you’ve spotted my painting. If you look closely you’ll see that this landscape has something in common with the original inspiration piece – the sky! I loved it so much I copied it. The layout of the painting came from a photo I snapped of a local field, the colors came from the new room décor, and the stylistic look was inspired by art I’d saved on my Pinterest art board.
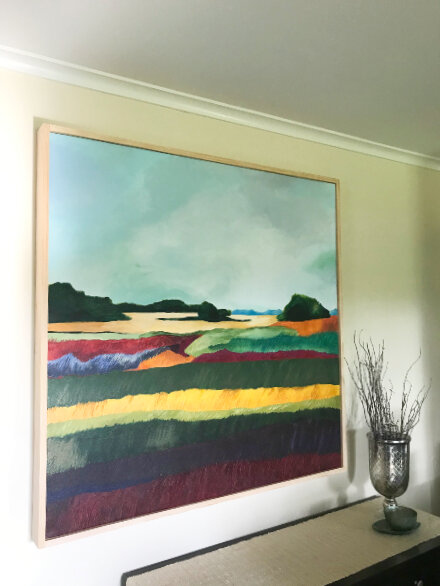
Of course, most of the time I’m sitting at my desk and the painting isn’t in my line of sight. I still enjoy the view of everything else in the room, and being able to take in the view and sunlight from the two large windows is a big bonus.

It’s just so much more vibrant than it used to be:
Oh, and I think my final mood board looks pretty comparable to the first one I put together back in January:
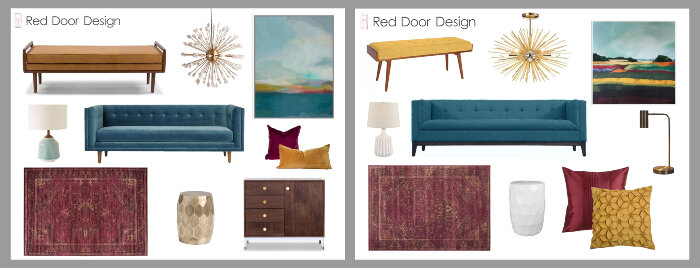
As a reminder, the items on the original board would have totaled over $6,000!
My room (the entire room, including all the new furniture and accessories and DIY supplies) cost $1900. Not free, but definitely better than six grand! Which I guess proves that you can indeed ‘get the look for less’…if you’re up for a lot of DIY and a smattering of improvisation. 😀
PS – If there’s anything from either mood board that you’re interested in seeing online, I’ve added links to all of the sources below as a reference for you: